Showing posts with label Decorative Label Punch. Show all posts

Saturday, 20 February 2016

Flowering Fields - Celebrate You

Hi there welcome back.....

We are continuing the Flowering Fields theme with today's card and adding a bit of Wildflower Fields as well.

I like this sentiment its from a fabby stamp set called Suite Sayings and is available from the Spring/Summer Catalogue until 31st May...


My card base is Old Olive with a layer of Blackberry Bliss, followed by a layer of Wildflower Fields DSP. I stamped the image in Old Olive and Blackberry Bliss using markers to colour the image, then I coloured in the leaves with Pear Pizzazz and the flowers with Perfect Plum.


I stamped the sentiments in Blackberry Bliss, then using a bone folder I curled the card so it would stand out. I used the Curvy Corner Trio Punch to shape two of the corners of the topper and mounted it on to a piece of Old Olive card and cut the corners to match. I used dimensionals to mount this on to the card.


I wrapped some thick bakers twine around the card finishing in a knot and then I frayed the ends. You can colour the thick white bakers twine using an ink pad or the re inkers, just make sure its dry before putting on you project....lol. 


Product List

I hope you like today's card, Thanks for stopping by...
Happy Crafting X

Thursday, 7 January 2016

Beautiful Birthday Card

Hello and welcome back....

Today I am sharing a birthday card I received from my best friend for my birthday, which is today...yay.
 
Its a large A5 card and she has used the gorgeous New Bloomin' Heart Thinlits Dies, as well as the Hello You Thinlits and the Little Letters Thinlits, ( she got a new Big Shot for Christmas...lol).
 
The Bloomin' Heart Thinlits Die is so beautiful and intricate, here she has cut the heart out and then put it back in, with a layer of pretty paper underneath.


Love this font, in this set you get happy, hello, you and thanks, really useful and versatile.
 
Love the card, thank you so much to my Bestest friend Elaine....


Thanks for stopping by....
Happy Crafting X

Friday, 27 November 2015

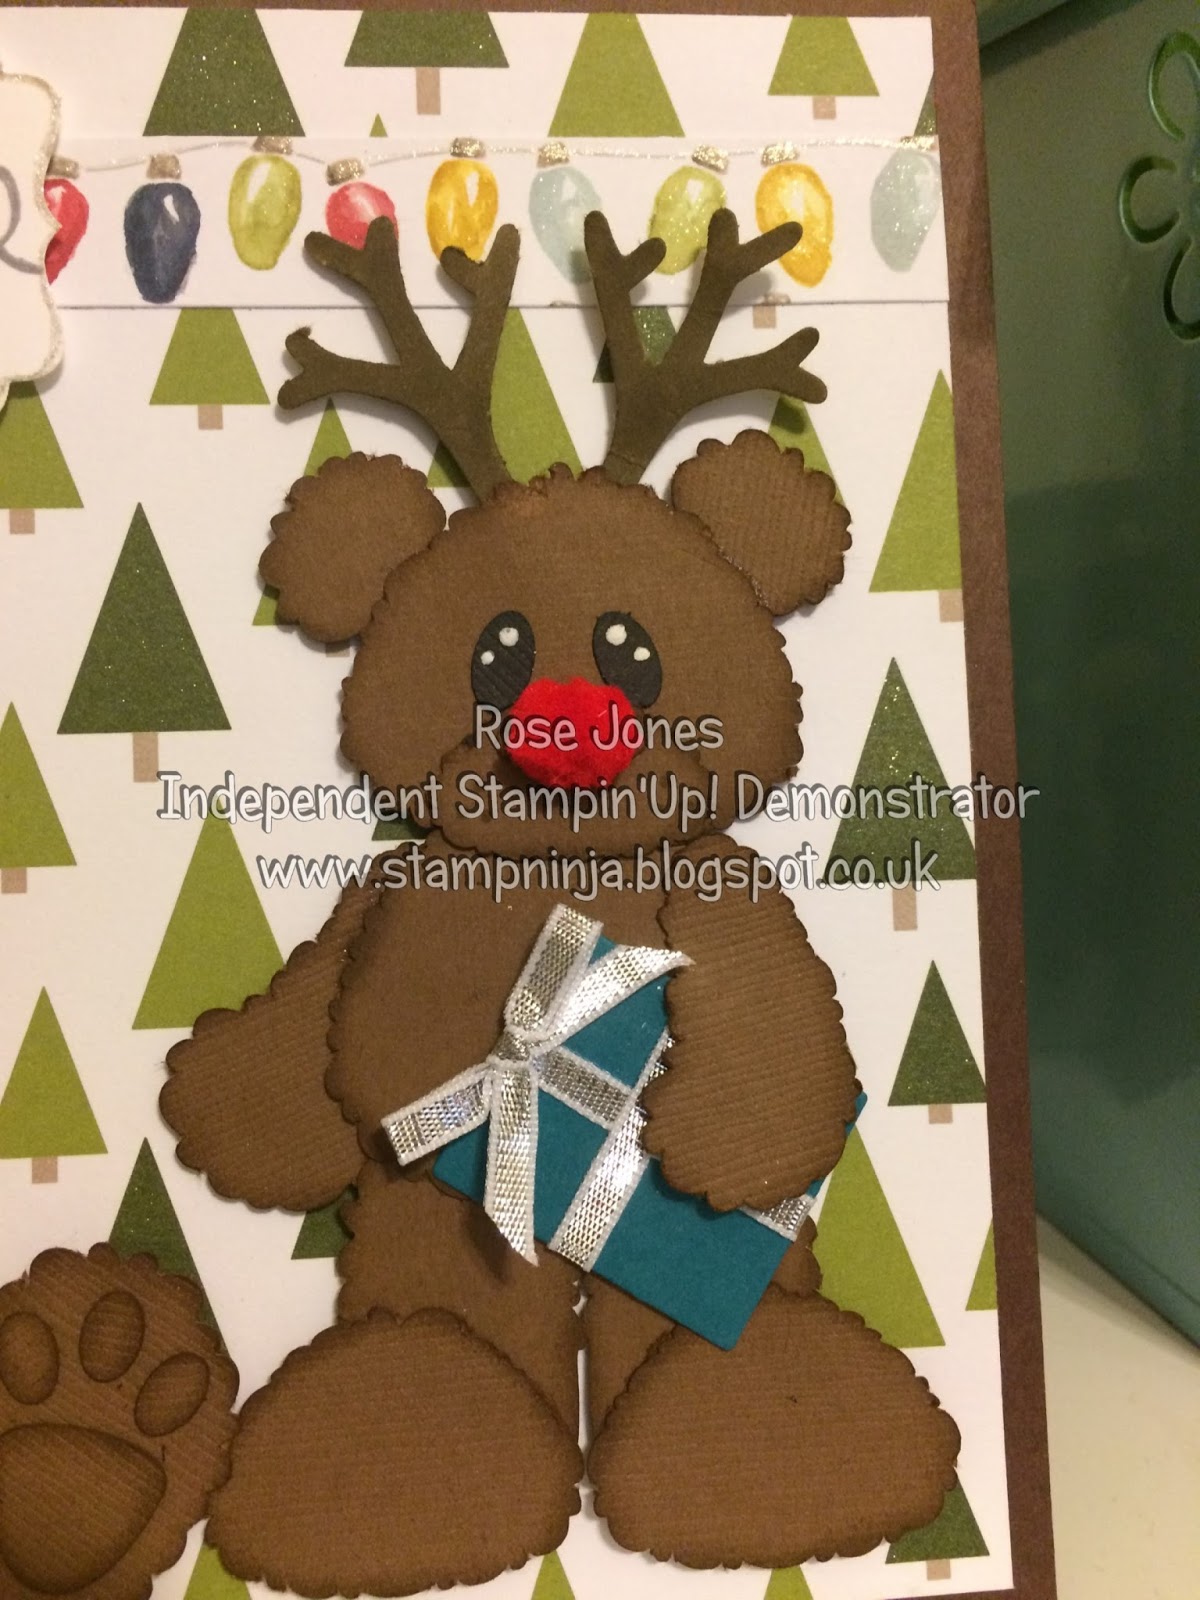
Rudolph the Red Nosed Teddy Bear!

Hello and welcome back...

I have such a cute card to share with you today, I love doing paper piecing, some I cut by hand, others I use my Silhouette Cameo. (Even better if I can do them with punches..)
These little fellows have been cut out on my Silhouette with a little punch art thrown in... Are they not adorable.....

 
The card base is Chocolate Chip card and on that I have put a piece of Merry moments Designer Series Paper. I used my glitter brush pen to add glitter to all the Mellow Moss trees (the dark ones). I also added a strip of Seasons Of Cheer DSP and added glitter to the baubles as well.

 
I sponged around the edges of each part of the teddies and then assembled them, the antlers are punched out using the Tree Builder Punch. The nose is cut from the Pom Pom Trim

 
And you know how we crafters like to use up every little scrap, well the presents that the teddies are holding are the waste from cutting out the window from the Hearth and Home Thinlits die. You get perfect little rectangles, just add some ribbon and instant present....

 
The sentiment (one of my favourites) is from the Wondrous Wreath Stamp Set, stamped in Smoky Slate and punched out with the Decorative Label Punch.

 
Such a couple of cuties....


I hope you like, thanks for stopping by....
Happy Crafting X

Thursday, 16 July 2015

Summer Silhouettes Beautiful Birthday

Well hello and welcome back...

I am so loving this Stamp Set Summer Silhouettes it is definitely a favourite. Now when I first saw this colour combo I wasn't too sure about it! But it is actually really pretty, Bermuda Bay and Rose Red.......What do you think..... 


The stems are stamped in Old Olive, the flowers in Rose Red and Bermuda Bay and the sentiment in Bermuda Bay and punched out with the Decorative Label Punch.


I made an envelope using my Envelope Punch Board and the Brights DSP and decorated it with the Summer Silhouettes Stamp Set to match the card...


And the finished card....beautiful....


Hope you like, thanks for stopping by...
Happy Crafting X

Sunday, 12 July 2015

Butterfly Thinlits Cards

Hello and welcome back....

I hope you have had a good weekend, I had my best friend to stay for the weekend and we have had a great time crafting, messing around with different techniques, its been fab.....

The card I am sharing today is one that we were playing with, it stars the beautiful Butterfly Thinlits.....
My friend wanted to make a card using the negative ie using the butterfly as a stencil and daubing through, which was very pretty. I liked colouring the butterfly with different inks and using it as a focal point for the card....


You get 3 dies in the Butterfly Thinlits, the large and medium intricate cut butterflies and a solid butterfly which co ordinates with the butterfly from the Butterfly Basics Stamp Set.


I coloured each butterfly with 3 blue inks using the sponge daubers, starting with the darkest in the center to the lightest on the outer edge.


I used the spots and splodges from the Gorgeous Grunge Stamp Set for the background. The sentiment is from the Wetlands Stamp Set.


I used the Decorative Label Punch to punch out the sentiment for this card, why? because I didn't get it straight on the card....lol


And there we have two beautiful cards...


Well I hope you liked today's cards, pop back tomorrow to see more of what we created...
Thanks for stopping by..
Happy Crafting X

Saturday, 20 June 2015

Just For You Treat Box

Hello and welcome back,

I have a lovely little box made using the envelope punch board to share with you today, it is just the right size for a box of maltesers, so would make a lovely teacher gift.....


I have used the lovely New Schoolhouse Designer Series Paper...


You could use Pacific Point, Pool Party or Whisper White ribbon with this paper I chose Pool Party... I used the Decorative Label Punch for the sentiment, to get the mat behind it I punched out two Pacific Point labels then cut one in half horizontally and the other in half vertically, then you just stick them behind the white label.


If you want to see how it is made check out this great tutorial Envelope Punch Board Maltesers Box Tutorial


Mmmm just thinking I wonder how long those Maltesers will last....not long is my guess...lol


So how cool is that and really quick and easy to make....
Thanks for stopping by...
Happy Crafting X

Wednesday, 13 May 2015

Hello Baby Card

Hey there and welcome back,

So I have been super busy making my swaps (see previous post) and these are now complete...yippeee! and with that out of the way I decided to make another bear! As I was making it I knew it was going to be a she.....lol  and I also knew I wanted to make a baby card....

So here it is....


Now pink is not my fave colour...not by a long way, but as I was putting this card together I actually quite like the colour combination. I do love the rich colour of Melon Mambo....


I used my Melon Mambo Stampin'Write Marker to do the faux stitching around the edge. And I just love the Venetian Crochet Trim it is gorgeous. 


The cute little bow is made using the heart punch from the Itty Bitty Accents Punch Pack, and the 1/4" Circle Punch.


For the background I used a retired set called Bundle of Love stamped in Melon Mambo.


The Decorative Label Punch was just the right size for teddy to hold. The sentiment is from the Teeny Tiny Sentiments Stamp Set.


And there you have it a totally adorable card....


Well that's all for today. Thanks for stopping by....
Happy Crafting x