Showing posts with label Peaceful Pines Stamp Set. Show all posts

Monday, 23 November 2015

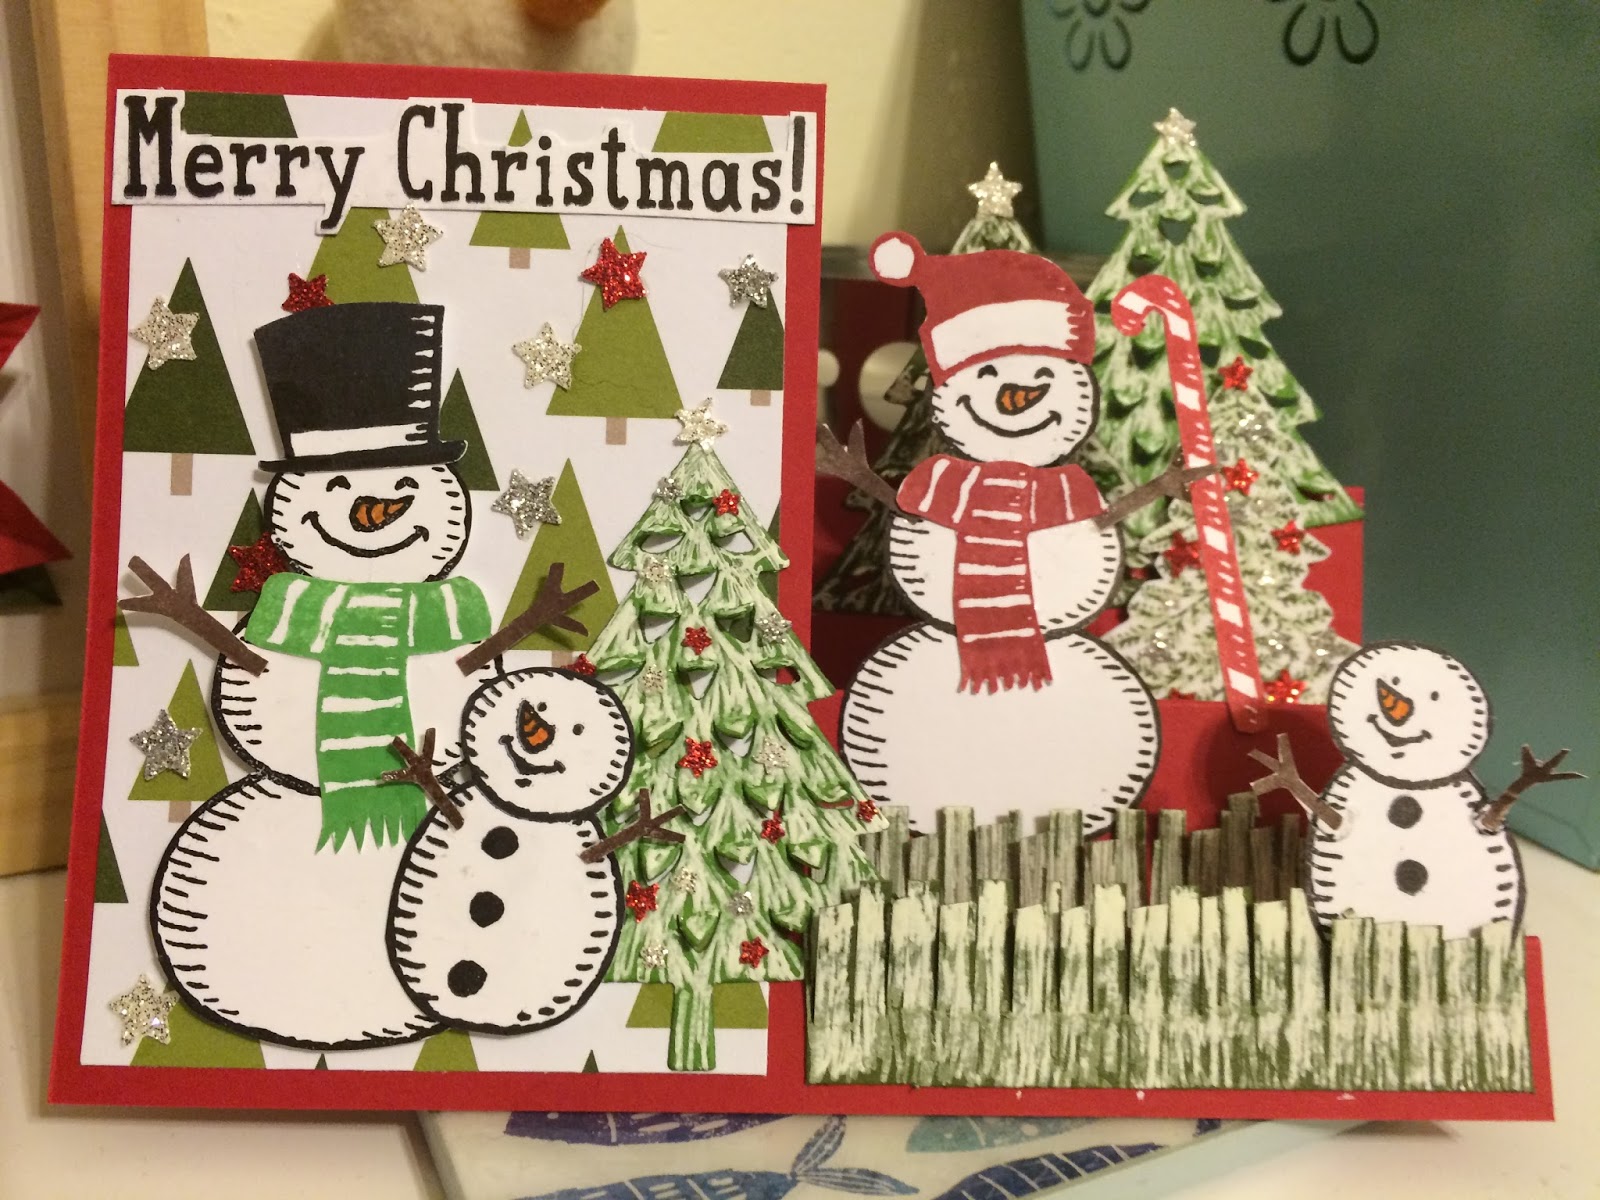
Snow Place Step Card

Hello and welcome back....

Isn't it funny how you sometimes forget things that you have done and then come across them whilst tidying, that's how this card came to be I haven't made one in ages so thought I would do a Christmas Step Card....

 
Isn't it fun, its a little like the card in a box, the right side has three steps, so you have layers of things going on.

 
I am not sure about the Merry Christmas, I wanted to show as much background as possible, so fussy cut around it, but I'm not entirely sure I like it! Do you ever do that?

 
Something else I have just realised I was going to do was put a little bird on the candy cane!  Oh well I will add it later....lol. I cut some grass using the Fringe Scissors and then added snow with the White Gel Pen.

 
I love the trees that the Perfect Pines Framelits cuts out, it gives a lovely 3D effect. I punched out lots of sparkly stars using the Confetti Stars Border Punch and the Silver, Red and Dazzling Diamonds Glimmer Paper.

 
I used the White Gel Pen to create snow on the trees and decorated some of the trees with sparkly stars.

 
There's the finished card....well nearly...add one bird and change the Merry Christmas...lol.


Hope you like, thanks for stopping by....
Happy Crafting X

Sunday, 22 November 2015

Snow Way Card in a Box

Hello and welcome back....

Today I have another card in a box to share with you this time using the Snow Place Stamp Set and matching Snow Friends framelits, along with the Peaceful Pines and matching Perfect Pines Framelits.

 
The card box base has been made exactly the same as yesterday, I made up 3 from a piece of 12" x 12" Real Red card. Then I added a piece of Soft Sky card 3 1/4" x 3 3/4" which I had put through the Big Shot in the Softly Falling Embossing folder.


Then I took some Merry Moments Designer Series Paper, (one 3 1/4" x 1 3/4" and two 1 3/4" x 1 3/4" ) and stuck them to the flaps. I made a banner using the Snow Way sentiment and added some holly which I had coloured using Stampin'Write markers and popped it on the front.

 
Then I stamped and cut out the penguin and snowmen plus accessories and stuck them in the box.
 
Next I stamped and cut out the trees from the Peaceful Pines stamp set and added them to the box. One of the dies cuts little v's in the tree which push up to give a 3D effect, really pretty.
 
And finally I added a little bird on top of the large snowman's candy cane, he's from the Santa's Gifts stamp set and some stars I punched out using the Confetti Stars border Punch.

  
And here's the finished card, so, so cute...


I hope you like, thanks for stopping by...
Happy Crafting X

Saturday, 21 November 2015

Christmas Card in a Box

Hello and welcome back....

Do you remember this?
 
Its a card in a Box, this one was made using the From Land to Sea Stamp Set, well ever since I made this I have been itching to make a Christmas themed one. I love these Cards in a Box and the awesome thing is they fold flat to go in an envelope, so not too heavy on the postage...lol


How cute is this....I have to admin I used a retired set in the making of this card, Holiday Home is one of those sets which you just can't let go and it works so well in this card. The other set I have used is Peaceful Pines which is just gorgeous and it has a matching set of dies, my favourite kind of stamp set...lol. Saying that both sets are easy to fussy cut, lots of straight lines....


So the card box itself is very easy to make, I used a piece of Real Red card 4" x 12" and scored it at 2", 5 1/2", 7 1/2" and 11" along the long side, then turning it around I scored at 2" on the short side, (which is basically in half). So then you cut up the score lines on the long side to the middle score line and fold down the two small tabs and one large tab leaving one large tab not folded down, this will be the back of the card box.

 
Don't worry if you fold all the tabs down, I put a piece of Soft Sky card which I had stamped and embossed with little white snowflakes in the back for the sky and also a piece of whisper White on the very back to write a message on, so that holds it upright.


Once you have stuck he card box together you need to make two dividers to stick all your elements to. I used two pieces of Real Red card 1" x 4 11/16" and scored them at 5/8" each end. These then get stuck inside the box flush with the top. I usually put the back one in first and then the second one is easier to go in.


So that is the basic box, now all you have to do is decorate it.


I stamped the sentiment onto Whisper White in Choc Chip added a wooden snowflake and a pine sprig.

 
 The houses I stamped in versamark on Chocolate Chip, Soft Suede and Crumb Cake and embossed them with White embossing powder.
 
 
I stamped the trees in Old Olive, Mossy Meadow and Always Artichoke, there are six tree in the stamp set, I did two in each colour.

 
These are such a lot of fun to make, you can add as much or as little as you want, check back tomorrow for a snowman card in a box...


Thanks for stopping by...
Happy Crafting X