Showing posts with label Happy Scenes Stamp Set. Show all posts

Thursday, 24 December 2015

Christmas Table Place Names

Hello and welcome back....

I have been busy preparing for Christmas day, we are spending Christmas with my Best Friend and her family so I will be away from home for a week so this could be my last post for a while....maybe...
So my friend decided we needed place cards for the Christmas table.....


So here they are..... using two of my favourite stamp sets, Santa's Gifts and Snow Place. I did a bit of brayering, I masked off the bottom part of the Place card and brayered Soft Sky on the top part, then stamped the trees from the Happy Scenes stamp set in Garden Green.
 
I removed the mask and added some snow detail to the trees and ground using a white gel pen. The names were made using the Rotary Alphabet Stamp and Word Window Punch.

 
I decided to do half of them with Penguins on and half with Reindeers on, I stamped them in Basic Black and then used a blender pen to colour them in.


And I couldn't forget that little bird, here I made him a little Robin....


I think everyone liked them....

I have listed all the products used to make them below, but hurry because there is only 9 more days left to order from the Autumn/Winter catalogue and then they are gone....


Hope you like, thanks for stopping by...
Happy Crafting X

Thursday, 3 December 2015

Santa Hugs Christmas Cards

Hello and welcome back...

I loved the cute tags I made on Tuesday so decided to make some Christmas cards....

 
So I used a Thick Whisper White card base, then I cut a piece of Whisper White card to mat on top. I used the Curvy Corner Trio Punch to shape the top and the corner punch to shape the bottom.

 
Then I brayered Soft sky over the top of the card, I created a mask by stamping the trees from the Happy Scenes stamp set on to some sticky paper and cutting along the ground. I attached this to the bottom of the card before I brayered.

 
I then stamped the trees where the sky meets the ground which is now the perfect shape, I used the white Gel pen to add some snow to the trees and to the sky. I also drew along the ground and under the trees.

 
I stamped and cut out the figures and coloured them with a blender pen and ink pads and added some glitter here and there.

 
They are so adorable, I just love these cute figures.

 
And there we have it, some super cute Christmas cards...

I have listed everything I used to make these cards below, just click on a product to go to my on-line store...Thank you.


I hope you like, thanks for stopping by.....
Happy Crafting X

Tuesday, 1 December 2015

A Hug from Santa...

Hello and welcome back....

I am loving the Christmas Stamp Set Santa's Gifts, it has such cute images.... Here I have been using it to make some more tags for Christmas Gifts...

 
Are they not adorable...I think so... Santa is giving Rudolph a big hug to say thank you for another great year...

 
To make the tag I cut 9 tags from one A4 sheet of Thick Whisper White Card, they are approx. 7cm x 10cm. Then I punched a slot at the top using the Curvy Corner Trio Punch, and using the same punch I punched the rounded corners. I brayered the top part of the tag with Soft Sky Ink and stamped the sentiment in Basic Black at the top.

 
Then I stamped the Pine Trees from the Happy Scenes Stamp set in Garden Green and added some snow effects using the White Gel Pen.

 
I stamped Santa, Rudolph and the little Bird in Basic Black and fussy cut them out. Then using my Blender Pen and ink pads I coloured them all in. I added some glitter accents to the Birds scarf and to Rudolph's scarf.


I coloured the white bits of Santa with the White gel pen and added some glitter to his hat and coat trim. I used a silver sharpie to colour his belt buckle. I put a little glitter on Rudolph's nose as well. So that Santa could give Rudolph a hug I cut down Santa's arm so Rudolph can fit in. Then I put Santa on the tag with dimensionals and stuck Rudolph's body to the tag leaving his head free. Lastly I popped the little bird on top of the tree.

 
I have listed all the products used to make these tags below, just click on an of them to go to my online store...


Thanks for stopping by...
Happy Crafting X

Thursday, 19 November 2015

Gold Curvy Keepsake Boxes

Hello and welcome back...

I am sharing the Gold Curvy Keepsake Boxes today, I felt yesterday's post was getting a bit long so decided to post the Gold ones today......

 
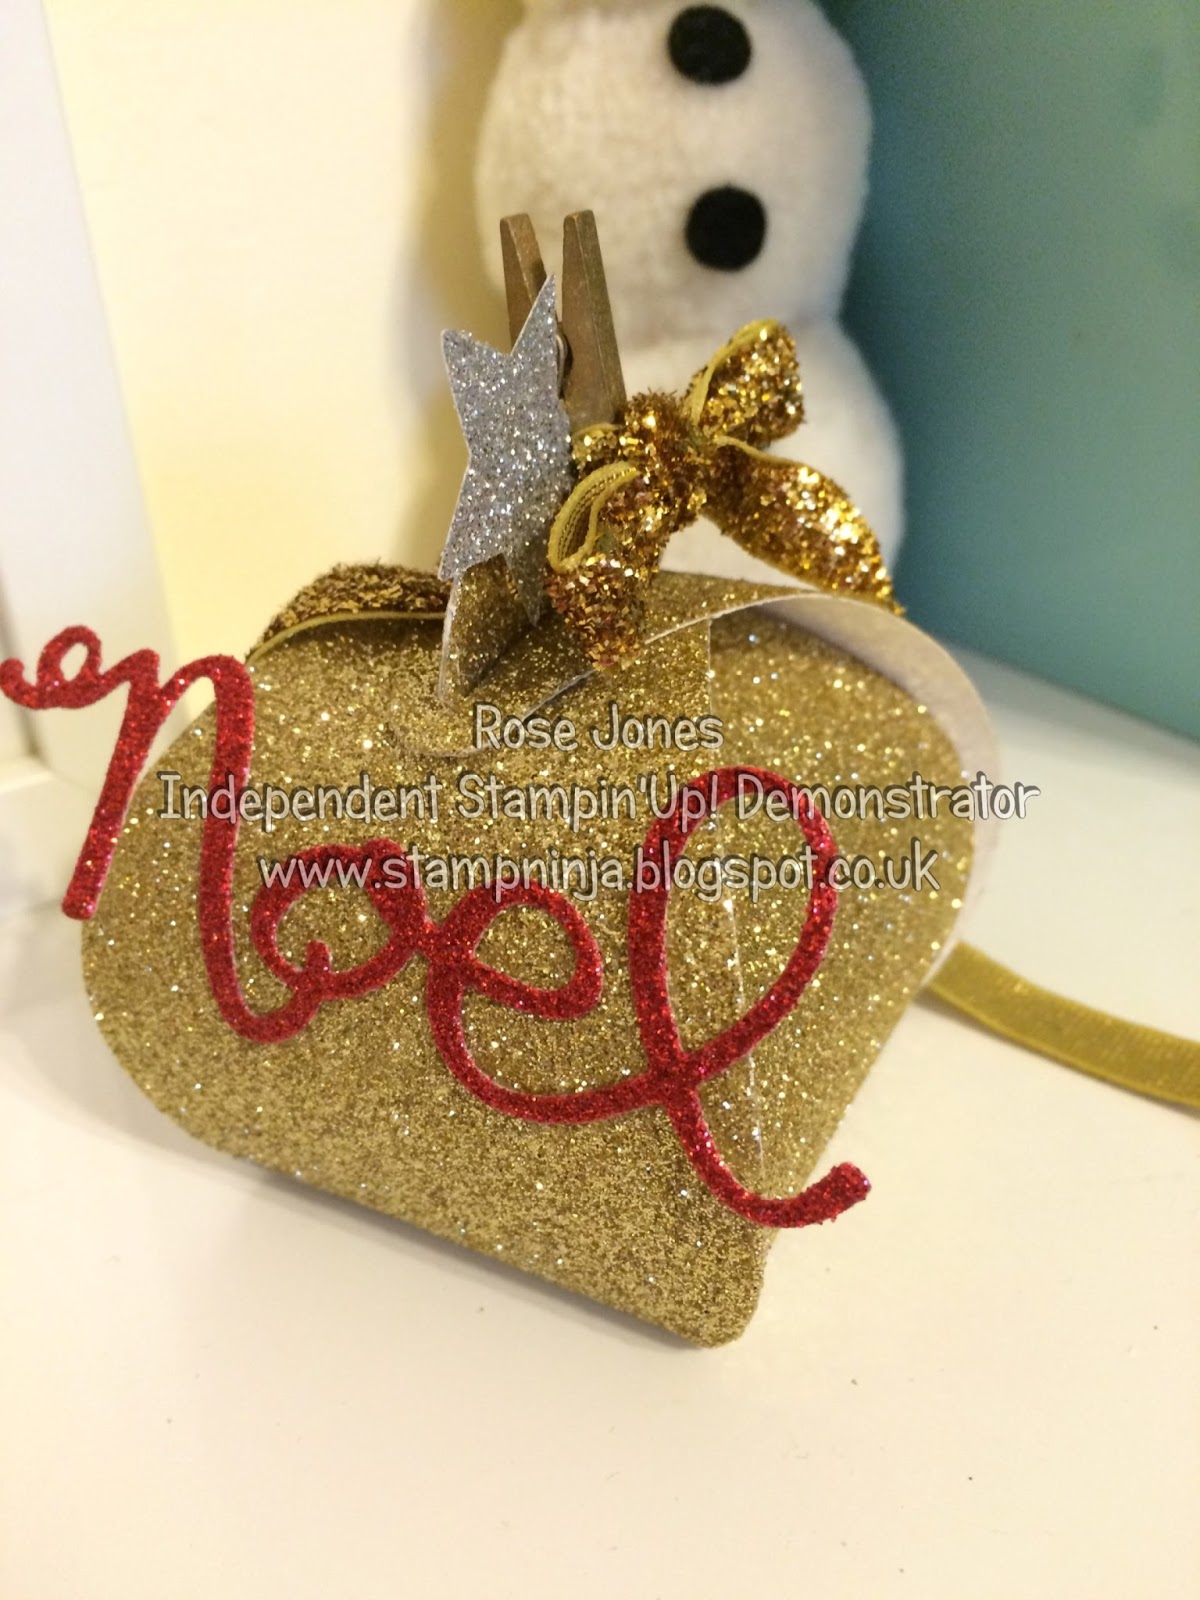
The first has been made using Gold Glimmer Card and it's so sparkly....

 
I used a Mini Metallic Peg to attach a bow, made from Gold Glitter Ribbon, to the box. That Ribbon is just gorgeous....Just sayin'


I also added the silver star I cut out from Silver Glimmer Card to the peg...

 
Then to finish this one off I cut out Noel from Red Glimmer Card and attached it to the box. It can be used for all sorts of occasions, not just Christmas, depending on how you decide to decorate the box.

 
Oh My! this next box is just so pretty, again if you don't want to emboss the box it looks great as is, but I just love what the Boho Chic Embossing Folder has done to make it just that little bit more special.
 
I teamed it with some Gold Sequin Trim....

 
Then using the same method as yesterday I cut out a Silver Foil Card Star Frame and stuck a Seasons Greeting to it using a glue dot. I may go back and redo the sentiment using Silver or gold embossing powder, I think it will look better.

 
I tied a bow made of 1/8" Gold Ribbon to the Gold peg and attached everything to the box using the peg....
 
These have got to be amongst my favourite boxes so far and definatly on my list for the Christmas Table this year....


So which is your favourite and have you been inspired to make some gorgeous boxes...I do hope so.
I have listed everything I have used to make these boxes here, just click on a product to go directly to my online shop, if you have any queries don't hesitate to contact me, I would love to hear from you.


Thanks for stopping by....
Happy Crafting X

Sunday, 1 November 2015

Hearth and Home Christmas

Hello and welcome back...

I have been playing with the Heath and Home Thinlits Dies, inspired by some of the cards that have been appearing on Pinterest where the die has been used to cut out a double window, so creating an eight pane window. So I had a little play and came up with a six pane window, which I really liked as you can get a bit more of a scene showing than you can with the original four pane window....

 
I guess the secret to cutting multiple windows is when you put the die through the big shot you have part of the die outside the cutting plates so it doesn't cut the whole die out.. I think its pretty cool..

 
So for this card I thought "Cabin in the Snow", so I took a piece of Soft Suede card 14.4 cm x 10 cm and stamped it with the Hardwood Stamp in Soft Suede ink. Then I look a piece of Whisper White Card 9cm x 8 cm and stamped the Winter Trees from the Happy Scenes Stamp Set in Garden Green and coloured the sky with Soft Sky ink. I added some white snow and highlighted the snow on the trees with a White Gel Pen. Lastly I stamped the little dog from the Stamp Set Jingle All The Way onto the card in Basic Black.

 
The greeting is from the Festive Fireplace Stamp Set, as is the Black Cat on the window ledge.
 
To assemble I cut a hole in the Soft Suede card that had been stamped with the Hardwood stamp and stuck the scene behind it and then I attached the window to the front of the card with dimensionals, to give the illusion of depth...

 
Love this card, pop back tomorrow to see a variation on the theme....


Thanks for stopping by...
Happy Crafting X

Tuesday, 27 October 2015

Wondrous Wreath Christmas

Hey there welcome back..

Who doesn't like a bargain! Well I know I do and the Autumn/Winter Catalogue is full of them, if you buy the Hearth and Home Thinlits Dies together with the Happy Scenes Stamp Set you save 15% off the regular price if brought separately... and if you buy Wondrous Wreath Framelits Dies along with the Wondrous Wreath Stamp Set you will save 15% off the regular price if brought separately....Just Sayin''

 
For this card I started off with a Cherry Cobbler card base and added a Whisper White mat which had been embossed with the Brick Wall Embossing Folder.

 
I cut the window out of Chocolate Chip card, then I cut a piece of vellum to go behind the window and embossed it with the Bo Ho Chic Embossing Folder and stuck it to the back of the window, then I cut a piece of Daffodil Delight and stuck that behind the vellum. Then I attached it to the card with dimensionals.

 
The wreath is stamped first in Old Olive, then Mossy Meadow and then the berries in Cherry Cobbler. Then I cut it out using the matching Framelits Dies. Then I stamped and cut out five of the little flowers and embossed then to give them dimension and used my Gold pen to colour the dots in the center. I stuck them to wreath and added a bow I cut out of red glitter paper using the Framelits dies.

 
I used dimensionals to attach the wreath to the window. The sentiment is from the Happy Scenes Stamp Set, stamped in Cherry Cobbler and punched out using the Word Window Punch.
 
I love the vellum effect behind the window it's like net curtains and the yellow gives the illusion of a light being on....

All of the products to make this card are available 24/7 from my on-line store.


I hope you like, thanks for stopping by...
Happy Crafting X

Sunday, 18 October 2015

A Cozy Christmas in the Snow

Hello and welcome back...

Yesterday I made a large square card using this stamp set, so today I thought I would revisit it as an A6 card and I love how changing things around gives you the same card but a different look.....

 
I guess I like A6 cards because you get two out of an A4 piece of card stock, so I usually do two cards at once, but as I was crafting with my best bud, we did one each...

 
I just love this ribbon its so beautiful as it is, or you can colour it to match your project and it looks great.
 
The Stamp Set Cozy Christmas is fast becoming a favourite, I am loving Santa and his Reindeer, and just look at that moon, I masked it off with a circle and brayered over it and then removed the mask and put the piece I punched the circle out of over and brayered a lighter colour over....love it...

 
I used the same brayering technique as yesterday to create the snow on the ground but this time I turned the mask around and brayered some soft sky on the bottom instead of sponging it..
 
I used a yellow marker to colour in the windows and used the White Gel Pen to do highlights and colour in the roof. The Let It Snow sentiment is from the Happy Scenes Stamp Set...


Hope you like, thanks for stopping by....
Happy Crafting X

Sunday, 20 September 2015

Hearth and Home Halloween

Hello and Welcome back...

Today's card features the fantastic Hearth and Home Thinlits Dies and the matching Happy Scenes Stamp Set.....


I cut out the window from Very Vanilla Card and cut an extra bit to make the rail that goes around the room. The bottom half I used some Naturals DSP and stamped the Halloween Greeting from the New Happy Scenes Stamp Set at the bottom, along with some pumpkins and bats....


I stamped the Halloween scene from the Happy Scenes Stamp Set on to a piece of Vanilla card and coloured it with my Stampin' Write markers, I added the spider's web in the corner and stuck it to the back of the window frame. Then I stuck it to the card using dimensionals.


The finished Halloween Card....


Pop back tomorrow for another Hearth & Home card....
Thanks for stopping by....
Happy Crafting X