Showing posts with label Circles Collection Framelits. Show all posts

Saturday, 14 May 2016

To Boldly Go....Birthday Card

Hello and welcome back...

I have to admit that I love Star Trek even from the very beginning, so when I saw this on Pinterest I just had to make it....


This card is A5 in size, with a base card of Basic Grey and then a layer of Smoky Slate. Then a layer of Basic Black which I have added stars to, I used the Confetti Star Border Punch to punch out the stars from some Whisper White and them I stuck them randomly to the card. What I like about this is that the stars are different sizes.


For the Enterprise I used punches, dies and my trusty Trimmer, I prepared all the pieces, most out of Smoky Slate with a little Real Red and some Whisper White card. I sponged around the edges of all the pieces before I assembled it.


For the saucer part I used the Circles Collection Framelits (also retiring, but being replaced by something hopefully better!) I hand wrote the name and number on the front with a Basic Black Marker Pen.


One of my favourite Birthday Phrases, from Remembering Your Birthday Stamp Set ( also retiring), I love this font and the cute sentiment...

I used:
Saucer Section 3 1/4", 1 7/8" and 1 7/16" Circle dies (or 3rd, 4th and 7th circle die 1 being the smallest)                                                                                                                    
2" x 1 1/4" rectangle tapered down to 7/8" and 1 3/4" x 1" rectangle tapered down to 6/8"
The bit that connects the back to the front  4" x 1/2"
The middle back section is the Extra Large Oval punched in Smoky slate with a bit trimmed off and a white oval placed behind it and trimmed.
The two engines are the Large Oval trimmed with a Real Red Oval behind it.
The joining piece is 3" x 1/2"
And there you have it The USS Starship Enterprise, if you would like to make this all the products used are listed below, Click on any item to go to my on-line store open 24/7 and don't forget to check out the Retired section for some bargains.

Product List

This is a Bitter Sweet time of year for me as a demonstrator, lots of things that I love are retiring but then there are lots of New gorgeous things coming.....
Thanks for stopping by...
Happy Crafting X

Tuesday, 29 March 2016

Cute Bunny & Kitty Cards

Hello and welcome back.

Today I have some really cute cards to share with you, made using dies and the Playful Pals bundle, the inspiration came from Brenda Quintana who has designed several animal shaped cards, she has Free Video Tutorials that you can follow, you can find her blog HERE 

I decided to make a cat card first and it had to be a Silver Tabby so this is what I came up with....


Isn't he adorable, each card follows the same basic steps so once you have mastered one you can then tweek it to suit your needs. To make these cards you will need the Ovals Collection Framelits, the Circle Collection Framelits and the Playful Pals Bundle.


To make the base card which is the body you will need a piece of card 6 1/4" x 2 1/2", for my cat I used Basic Grey card. You score the card at 3 1/8" and fold in half. Place this on the Big Shot with the fold at the top and then put the 3rd smallest Oval die on it so that the top of the die overlaps the folded edge. This will give you an oval card with a flat top where the fold is.


For the rest of the cat you will need:
From the Ovals & Circle dies: 4th smallest Circle for the Head (x2) and the Smallest Oval for the Legs (x2) and the 3rd & 4th smallest Ovals for the tail (x1).
From the Pyramid Pals Dies: small leaf shape for the Ears (x2) and the small Oval for the Paws (x2).


All pieces have been sponged with Basic Grey ink before assembly. To get the markings for the Tabby cat, there is a stamp which is the inside of the ear but can be used to make the stripes as shown, I used a Basic Grey marker to add some to the tail and paws.


For the face I used the stamps from the stamp set except for the eyes which i punched out using the 1/4" and 1/8" punches.


The back view shows how the Ovals for the legs have been placed and also the tail. I used the secon circle on the back of the head after I had stuck the ears on to tidy it up a bit.


And there you have it a really cute cat shaped card,You could also stick this to a basic card front if you wanted a more regular shaped card, it fits perfectly on a A6 card.


 Here is the Bunny shaped card made in the same way just using slightly different pieces


 Again I chose to use different eyes which I punched out using the 1/4" circle Punch.


Love his little bunny tail, its made with the die which is supposed to be an ear but its also great as a tail....lol


Such a fun use for all these dies, I should have played with this set sooner I could have made really cute Easter Bunny cards.

Product List

These little cards were such a lot of fun to make I do hope you will have a go, if you need any supplies just click on the product pictures above.
Thanks for stopping by....
Happy Crafting X

Thursday, 24 March 2016

Easter Lamb Day 4 - Birthday Bouquet

Hello and welcome back....

On to Day 4 of our Easter Celebrations with this pretty card...


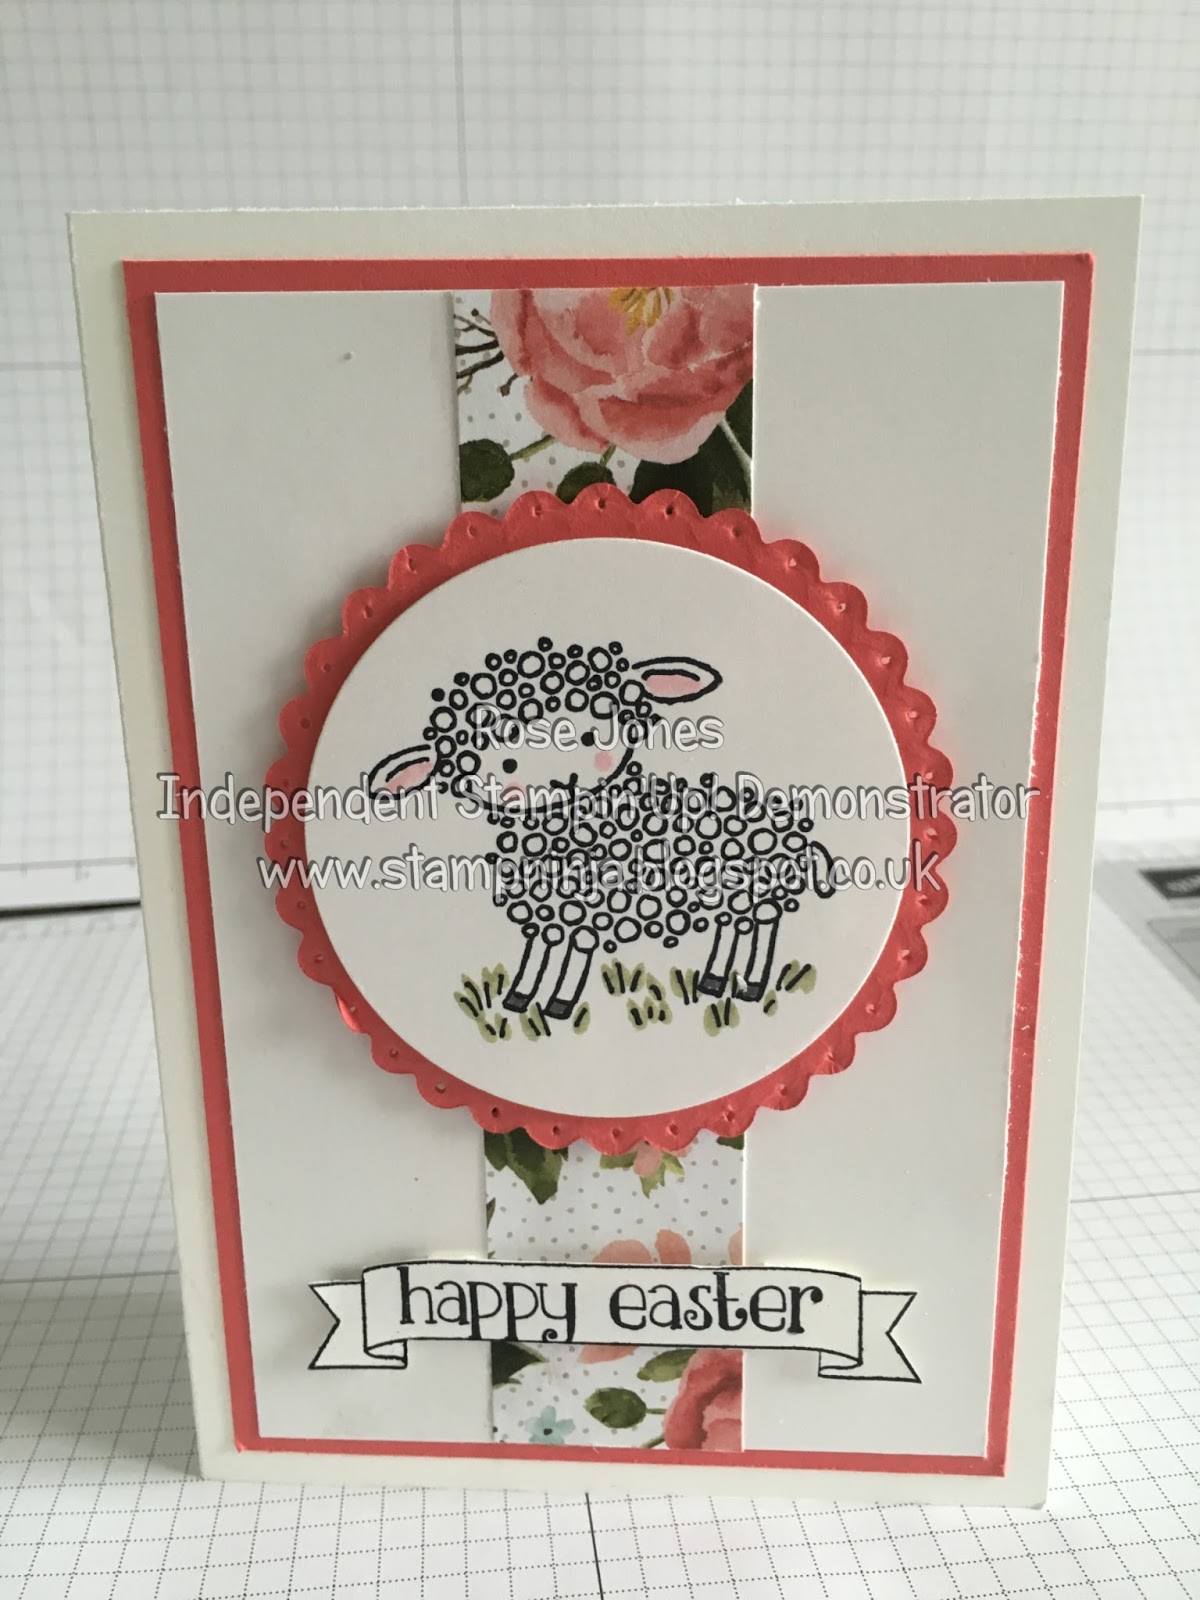
The base card is Thick Whisper White with a layer of Watermelon Wonder card on top, then a piece of Whisper White card with a little bit of Birthday Bouquet DSP down the center.


The lamb has been stamped in Basic Black on Whisper White and cut out using a circle die, this has been matted onto a scallop circle of Watermelon Wonder card.


I used my pricking tool to make holes in each scallop and stuck it to the card using dimensionals. I coloured the grass with a Pear Pizzazz marker and the ears and cheeks with a Pink Pirouette marker.


I stamped the Happy Easter in Basic Black and then stamped the banner over it ( which is easy as its a photopolymer stamp) and then cut it out using the die from the Large Numbers Thinlits Dies. 

All products are listed below...


Product List

Thanks for joining me...
Happy Crafting X