Showing posts with label Thank You Card. Show all posts

Wednesday, 3 May 2017

An Open Heart Thank You

Hi there and welcome back...

Today's card features the gorgeous An Open Heart stamp set and the Hardwood Stamp. I love this stamp set and don't think I will ever part with it, sadly it is now retired from Stampin'Up, though it may be available on the secondary market. 


The base card is Night of Navy, with a layer of Soft Sky on top. The bottom half is Whisper White and I have stamped it with the Hardwood stamp in Smokey Slate. I sniped between each panel to give it a more authentic look.


 I stamped the bird in Chocolate Chip ink on to a scrap of Whisper White and then using Blender Pens I coloured it in with So Saffron, Crushed Curry, Crumb Cake and Soft Suede inks.


I stamped Thank You on to a scrap of Whisper White and punched it out with a scallop oval, then I sponged around the edge with Chocolate Chip ink.


I stamped the foliage in Pear Pizzazz and went over the stems with a Chocolate Chip Marker and the leaves with a Garden Green Marker and the berries in Cherry Cobbler.
All items are available through my on-line store, just click on the Shop With Me icon at the top or on any of the pictures below.

Product List


Thanks for stopping by....
Happy Crafting X

Tuesday, 17 May 2016

The Wilderness Awaits Day 2 - A Foxy Thank You Card

Hey there and welcome back....

Today's card features the Fox image and he is just gorgeous, I have teamed it with the fabulous "Wonderland" trees and also the awesome "Lovely As A Tree".


 The base card is Chocolate Chip with a layer of Delightful Dijon on top.


The Fox has been stamped on a separate piece of Whisper White coloured in and cut out. I used my Aqua Painter, Soft Suede and Cajun Craze inks to water colour him then I used a Cajun Craze marker to do some shading. I used a Garden Green Marker to colour in the grass he is sitting in.


For the background I masked off the bottom of the card and stamped the beautiful trees from the Wonderland Stamp set. Then I water coloured the bottom part with Garden Green ink and an Aqua Painter, I did the same with the sky but using Soft Sky ink.


I stamped the Thank You from An Open Heart stamp set in Basic Black and punched it out with the Word Window Punch and popped it on the card with dimensionals.


I stamped the leaves from Lovely As A Tree on to some Whisper White and Coloured them with My Aqua Painter and Garden Green ink, then I cut them out and stuck them to the card.

Product List
Only a few more days until the NEW Catalogue so check out my on-line store for retiring products at a discount...

Thanks for stopping by...
Happy Crafting X

Tuesday, 16 February 2016

Flowering Fields - Set of Cards

Hello and welcome back....

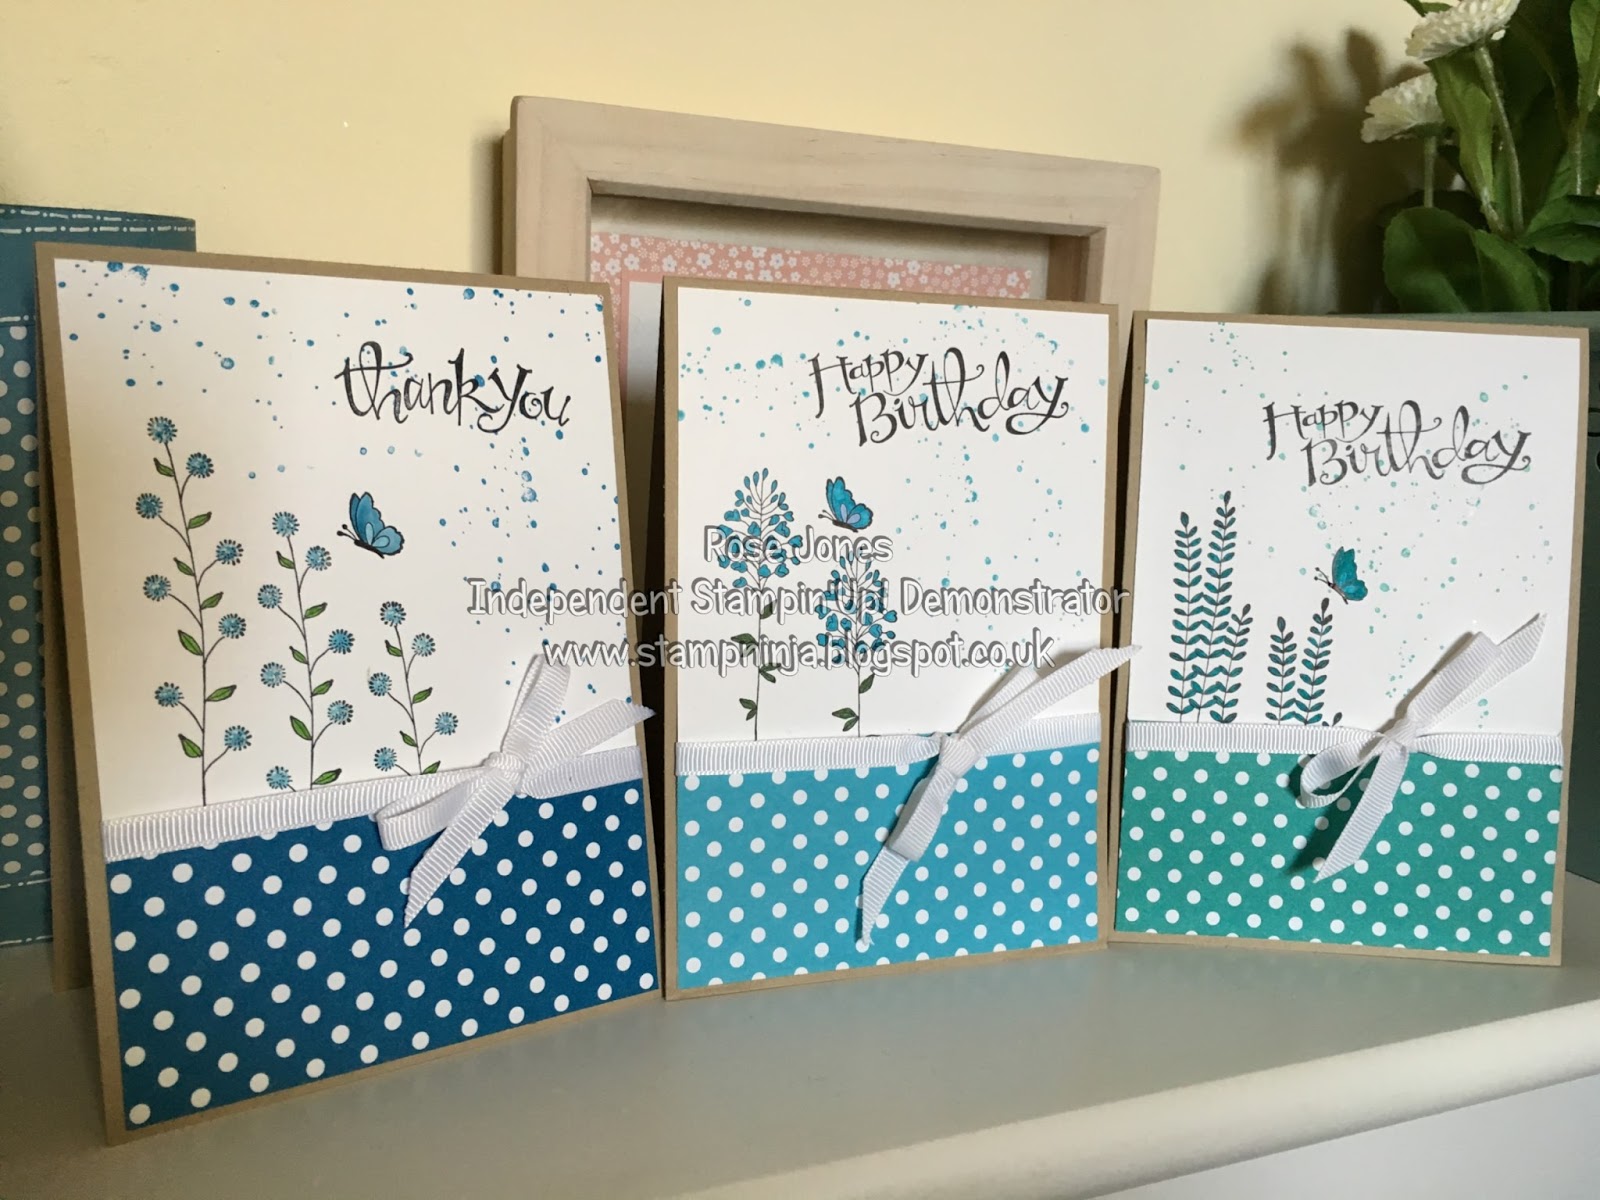
The cards I am sharing today are ones I made with my friend at the weekend, for these we used the Flowering Fields Sale-A-Bration Freebie, it is so pretty...


The card base for each of the cards is Crumb Cake with a layer of Whisper White on top.


At the bottom of each card is a piece of Brights Designer Series Paper (DSP).


We stamped five of the six designs on the Whisper White card and then coloured them in using Stampin' Write Markers, in colours to match the DSP


Here we have Pacific Point, Bermuda Bay and Tempting Turquoise, we used the sentiments from the stamp set Sassy Salutations. e added a piece of white ribbon around the card before sticking it onto the Crumb Cake base.


We also used one of the stamps from the Gorgeous Grunge stamp set in the background, stamping off once before stamping on the card.


We added a little butterfly to each card stamped in Basic Black and coloured in using the matching colour markers...


Here we have Real Red and Pumpkin Pie... such a pretty set of cards.....

If you would like to make this set of cards, I have listed everything used below, just click on a product to go to my on-line store.


Thanks for stopping by...
Happy Crafting X

Tuesday, 29 December 2015

Tin Of Cards

Hello and welcome back.....

The project I’m sharing today takes center stage on the cover of our Annual Catalogue this year. It’s the Tin of Cards Project Kit and it might be one of my favourite products in the catalogue.


In about an hour and a half I had all of the cards put together plus the dividers completed as well. The kit comes with materials for four each of four card designs for a total of 16 cards with envelopes. The entire project is so cute. I LOVE the cards and the tin is adorable too.


Here is a close up of the tin. It’s a really strong and stylish container for your cards. It is great to have as a back up for cards you may need in a rush, a forgotten birthday, an unexpected event, a quick thank you card....


The kit comes with nine dividers for you to stamp on and the co-ordinating Tin of Cards Stamp Set includes stamps for each of the tabs. If you wanted to add more dividers you can make them using the File Tabs Thinlits Dies.

 
The cards are so pretty and so easy to put together.


The first card is a beautiful Bermuda Bay, the word bubble on these is actually a wooden embellishment, so it gives texture to the cards.

 
I love this next card. It’s so bright and colourful.

 
Here’s the gold glitz card. Remember when you stamp the small words on the background of the card, make sure to stamp one card with ‘hello,’ one with ‘congrats,’ one with ‘happy,’ and one with ‘thanks.’ Don’t stamp all four with the same word, because when you go to add the large circular greeting you only get one ‘congrats,’ one ‘hello,’ one ‘happy birthday,’ and one ‘thank you.’  

 
I saved my personal favourite for last – the butterfly card. Isn’t this one a beauty? When assembling make sure you only place adhesive under the center of the butterflies so that you can pop up their wings!

So there you go. The Tin of Cards kit is a great gift for yourself or for someone else and is great value at £24.50, see below for details on how to order.


Just click on any of the products to go to my on-line store..
Thanks for stopping by...
Happy Crafting X