Showing posts with label Tree Builder Punch. Show all posts

Wednesday, 23 March 2016

Curvy Keepsake Wednesday

Hello and welcome back to another Curvy Keepsake Wednesday...

This week's box is super cute and would be a great little Easter Treat box....


How cute is this a little bunny running down his rabbit hole.. I wanted to create the illusion of the ground below and the grass above, so I cut out two box pieces in Soft Suede and two in Old Olive. I cut off the slotted side of the Soft Suede Pieces and cut off the handle sides of the Old Olive pieces, then stuck them together to make the box.


On the Old Olive sides I made some grass using the Fringe Scissors with some scraps of Wild Wasabi card. I punched out some flowers using the flower punch from the Itty Bitty Accents Punch Pack and drew the stems using a Wild Wasabi Marker.


On the back panel I stamped some splodges using one of the stamps from the Gorgeous Grunge stamp set.

I made a little butterfly using the Bitty Butterfly punch and stuck it to a piece of wire so that it looks like it flying over the bunny.


I used a 1" circle of Basic Black card for the hole and a 3/4" circle of Chocolate Chip card for the Bunny bottom, the tail is the flower from the Tree Builder Punch and the feet I cut free hand.


Product List

I hope you like this week's Curvy Keepsake box, thanks for stopping by..
Happy Crafting X

Saturday, 19 December 2015

Cute Teddy Calendar

Hi there and welcome back...

I love making novelty calendars, this one is one of my favourites, its a cute hanging Teddy Calendar. They are just so much fun to make.

 
Isn't she just the cutest, she's a paper piecing teddy which I cut out on my Silhouette Cameo form Pink Pirouette card, She has been sponged around each piece with Rose Red ink before assembly.

 
Her little bow has been made using the Heart from the Itty Bitty Punch Pack and the Flower from the Tree Builder Punch. Then I used the White Gel Pen to do some faux stitching. Her nose has been coloured with the Rose Red Marker Pen and then covered in Crystal Effects to make it shiny.

 
I used the Rose Red Marker pen to do faux stitching around all the pieces of the teddy and added some features to the face. Then I created a banner with a piece of Rose Red card, I used the Curvy Corner Trio Punch to shape the corners and did some faux stitching with  a White Gel Pen. Then I stuck the calendar to the banner.

 
Lastly I added some Thick Bakers Twine to hand the Teddy up with....

All products used are listed below, for easy ordering please just click on a product to go to my on-line shop.....


I hope you are enjoying all the calendars, thanks for stopping by...
Happy Crafting X

Friday, 27 November 2015

Rudolph the Red Nosed Teddy Bear!

Hello and welcome back...

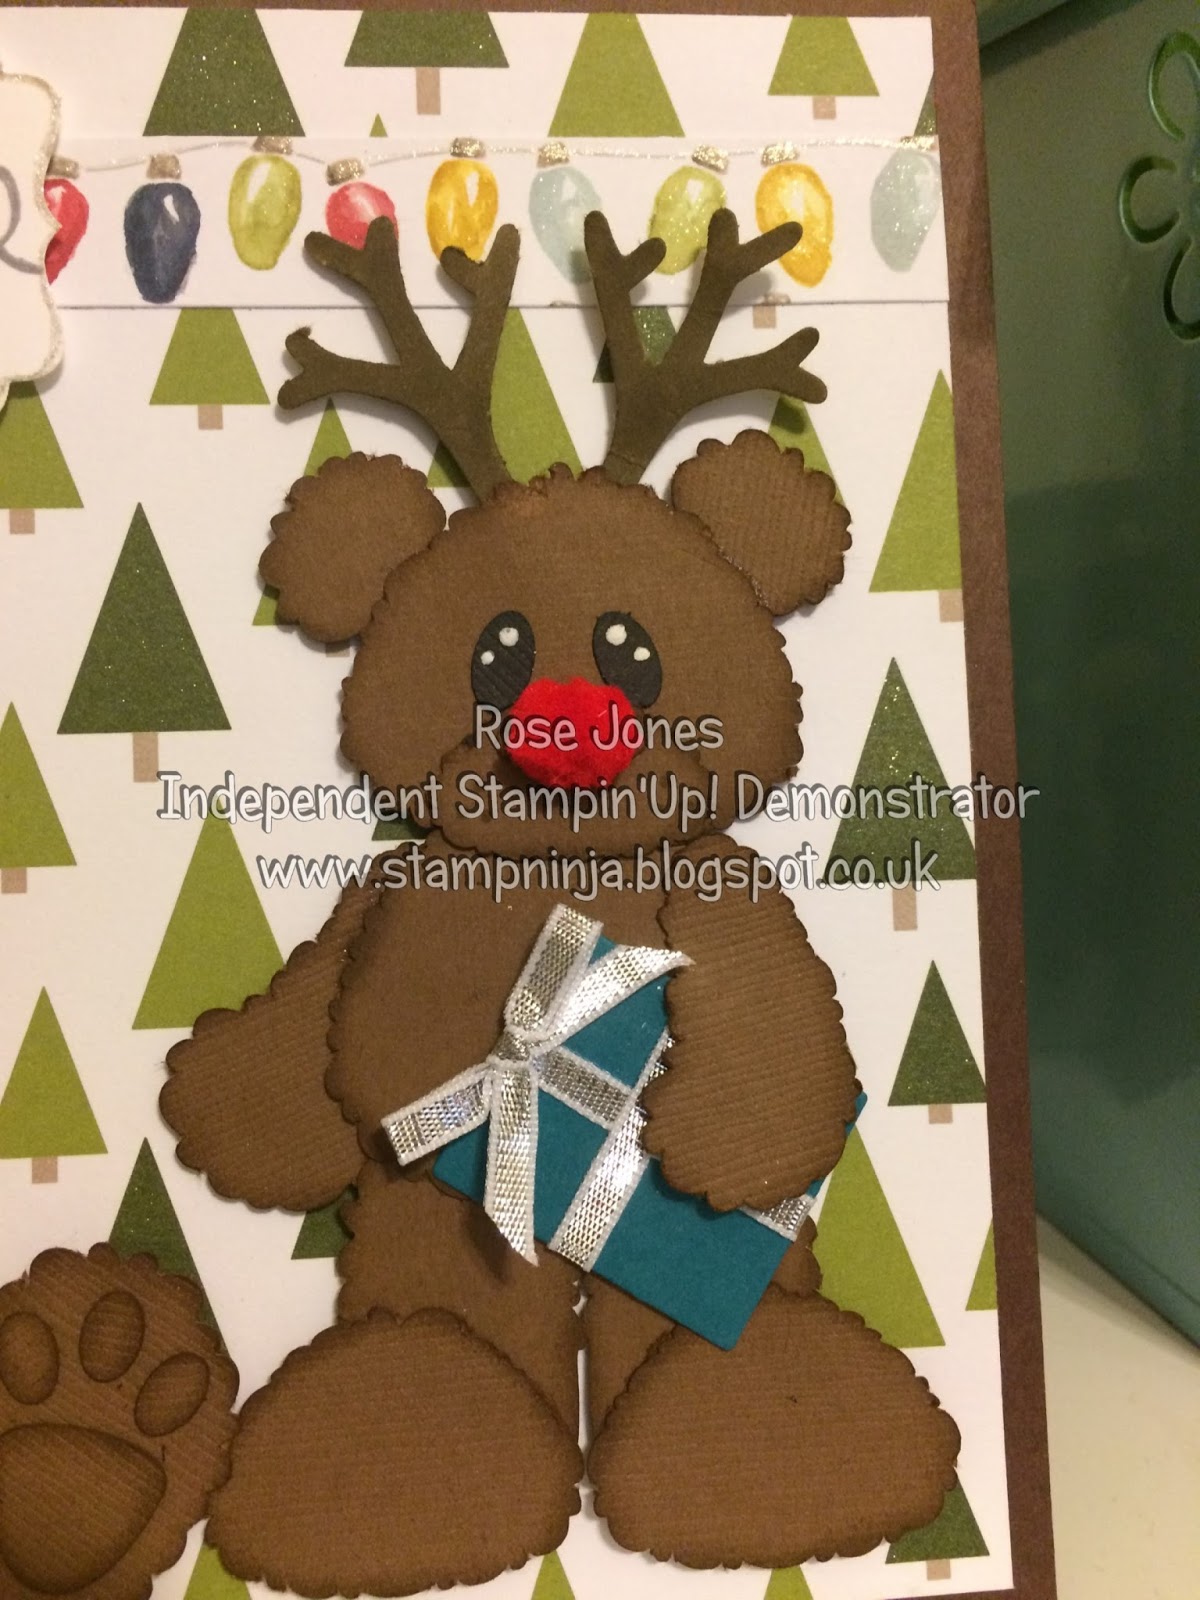
I have such a cute card to share with you today, I love doing paper piecing, some I cut by hand, others I use my Silhouette Cameo. (Even better if I can do them with punches..)
These little fellows have been cut out on my Silhouette with a little punch art thrown in... Are they not adorable.....

 
The card base is Chocolate Chip card and on that I have put a piece of Merry moments Designer Series Paper. I used my glitter brush pen to add glitter to all the Mellow Moss trees (the dark ones). I also added a strip of Seasons Of Cheer DSP and added glitter to the baubles as well.

 
I sponged around the edges of each part of the teddies and then assembled them, the antlers are punched out using the Tree Builder Punch. The nose is cut from the Pom Pom Trim

 
And you know how we crafters like to use up every little scrap, well the presents that the teddies are holding are the waste from cutting out the window from the Hearth and Home Thinlits die. You get perfect little rectangles, just add some ribbon and instant present....

 
The sentiment (one of my favourites) is from the Wondrous Wreath Stamp Set, stamped in Smoky Slate and punched out with the Decorative Label Punch.

 
Such a couple of cuties....


I hope you like, thanks for stopping by....
Happy Crafting X

Tuesday, 18 August 2015

Garden Visitors

Hello and welcome back...

I was inspired to make this card from this...


I love watching the birds in my garden and I had a real treat when two Gold Finches have started to visit, I am so glad I persevered with the Nyger Seed...


I have used the Chevron Border Punch to create the little bird house roof and the Banner Triple Punch for the house. Then added 1/16" circle for the perch and 1/8" circle for the entrance to the bird house.


The little bird is from the Tree Builder Punch as is the tiny yellow flower, the leaves climbing up the post are from the Bird Builder Punch. The branch has been cut out with my cutting machine and then stamped with the Stamp Set A Sheltering Tree...


The sentiment is from the Stamp Set Remembering Your Birthday....


So there we have it, a cute little garden scene......


Hope you like my little garden scene, thanks for stopping by.....
Happy Crafting X

Sunday, 16 August 2015

Summer Sandals

Hello and welcome back...

I love making things with card, I like all that fiddly messing about and the joy of having created something 3 dimensional out of something as simple as card...why is she waffling I hear you say!!! well because today's share is another of Becky Roberts patterns... a cute pair of Summer Sandals....


Oh My Goodness aren't they just the most adorable little Summer Sandals....lol.. I had so much fun making these.. I used the English Garden DSP ( I have actually used a whole pack of this already, usually it takes me ages to use a whole pack...I must like it...lol)


The bow is the gorgeous Seam Binding Ribbon ( my all time favourite ribbon ) if you buy the Whisper White you can dye it any colour you want using the Classic Stampin' Ink Refill, just remember to let it dry thoroughly before you use it!!!!!!


And these flowers are so pretty, they are made the same way as yesterday using the Petite Petals Punch, Itty Bitty Accents Punch Pack and the Tree Builder Punch. With the addition of another Petite Petal in Old Olive cut to make 2 leaves and 3 leaves.


I hope you like, thanks for stopping by...
Happy Crafting X 

Saturday, 15 August 2015

Summer Ensemble

Hello and welcome back...

Today I have a little Summer Ensemble to brighten your day and looking out of my window I would say that we need it, it is currently pouring with rain....lol....typical British Summer...

I would like to thank Becky Roberts for the patterns, check out her site Inking Idaho HERE she has some fab ideas. I didn't use the pattern for her Beach Bag as I didn't have the Kraft Tag A Bag Gift Bags so I made my own little bag...


Isn't this just an adorable beach set, Beach Bag, Flip Flops and Windmill to pop in my sandcastle...


Its quite a tiny little bag it measures approx 4 1/2" x 4" x 1" (11 cm x 11 1/2 cm x 4 cm ) and you can make it with one sheet of 12" x 12" card stock. I chose the beautiful Bohemian DSP...


I love this cute little tag with the miniature Flip Flops, the card stock is Blackberry Bliss and Island Indigo and there is  little bit of Venetian Crochet Trim too...


The bow has been made using the Bow Builder Punch out of Blackberry Bliss Card and the handle is held on to the bag by a Candy Dot Brad Base and a Island Indigo Candy Dot. I love that you can co ordinate the brad by just adding a different Candy Dot to the center....


How cute are these Flip Flops...


The flower has been made using 2 flowers from the Petite Petal Punch, 1 flower from the Itty Bitty Punch and a tiny flower from the Tree Builder Punch. Punch each flower out and scrunch them up, flatten them back out and layer them largest to smallest. Then add a brad to the center and attach to the flip flops.....


And here we have the perfect beach set, now all I need is to find where I put the Sun...lol


I hope you enjoyed today's little project, thanks for stopping by...
Happy Crafting X