Showing posts with label Christmas Tags. Show all posts

Tuesday, 1 December 2015

A Hug from Santa...

Hello and welcome back....

I am loving the Christmas Stamp Set Santa's Gifts, it has such cute images.... Here I have been using it to make some more tags for Christmas Gifts...

 
Are they not adorable...I think so... Santa is giving Rudolph a big hug to say thank you for another great year...

 
To make the tag I cut 9 tags from one A4 sheet of Thick Whisper White Card, they are approx. 7cm x 10cm. Then I punched a slot at the top using the Curvy Corner Trio Punch, and using the same punch I punched the rounded corners. I brayered the top part of the tag with Soft Sky Ink and stamped the sentiment in Basic Black at the top.

 
Then I stamped the Pine Trees from the Happy Scenes Stamp set in Garden Green and added some snow effects using the White Gel Pen.

 
I stamped Santa, Rudolph and the little Bird in Basic Black and fussy cut them out. Then using my Blender Pen and ink pads I coloured them all in. I added some glitter accents to the Birds scarf and to Rudolph's scarf.


I coloured the white bits of Santa with the White gel pen and added some glitter to his hat and coat trim. I used a silver sharpie to colour his belt buckle. I put a little glitter on Rudolph's nose as well. So that Santa could give Rudolph a hug I cut down Santa's arm so Rudolph can fit in. Then I put Santa on the tag with dimensionals and stuck Rudolph's body to the tag leaving his head free. Lastly I popped the little bird on top of the tree.

 
I have listed all the products used to make these tags below, just click on an of them to go to my online store...


Thanks for stopping by...
Happy Crafting X

Saturday, 28 November 2015

Perfect Pines Christmas Tags

Hello and welcome back....

Today I have some more Christmas tags to share with you, made using the Peaceful Pines Framelits dies.

 
I cut 9 tags from one sheet of A4 Crumb Cake card (same as last time) then using the Curvy Corner Trio Punch I cut the little slots for the ribbon and also shaped the corners.


Then using the Season of Cheer Washi Tape I added 3 strips across the middle of the tag, leaving room for the sentiment at the bottom.

 
Then I cut out the trees using the Perfect Pines Framelits die and using a second die cut the little v's in the trees which then pop up. The paper is English Garden DSP, I had some scraps left over which was just enough for the trees.


The sentiment is from the stamp set Santa's Gifts, stamped in Cherry Cobbler and then I have stamped snowflakes in Crumb Cake at the bottom of the tag and at the top of the tag.
 
 
Then I have added some of the 1/8" striped ribbon through each of the slots and stapled it in place.
 
Lastly I added the To and From in Soft Suede ink and a little bird at the bottom of the tag.... Finished....


Hope you like, thanks for stopping by.....
Happy Crafting X

Friday, 20 November 2015

Snow Friends Christmas Tags

Hello and welcome back,

Today I am sharing some Christmas Gift Tags I have made using the Snow Place Stamp Set and the matching Snow Friends Framelits dies. AND a quick reminder that today is the last day to get 20% off selected stamp sets...don't miss out, to see which sets are included in the offer see my post HERE.
So back to my Christmas Tags....

 
Here is a little box I made to hold the tags until I need to use them, really simple to make. I used a piece of Crumb Cake Card 21 cm x 12 cm and scored it at 8cm, 10 1/2cm,18 1/2cm and 21cm along the long side. Then 2cm along the short side and assemble. This box has no lid as the ribbons from the tags stick out the top.

 
Then I made a belly band and decorated it with the same stamps as the tags, and added some ribbon around the top and bottom.

 
I made 9 tags, 7cm x 10cm, as it meant I got 9 out of a sheet of A4 with no waste.

 
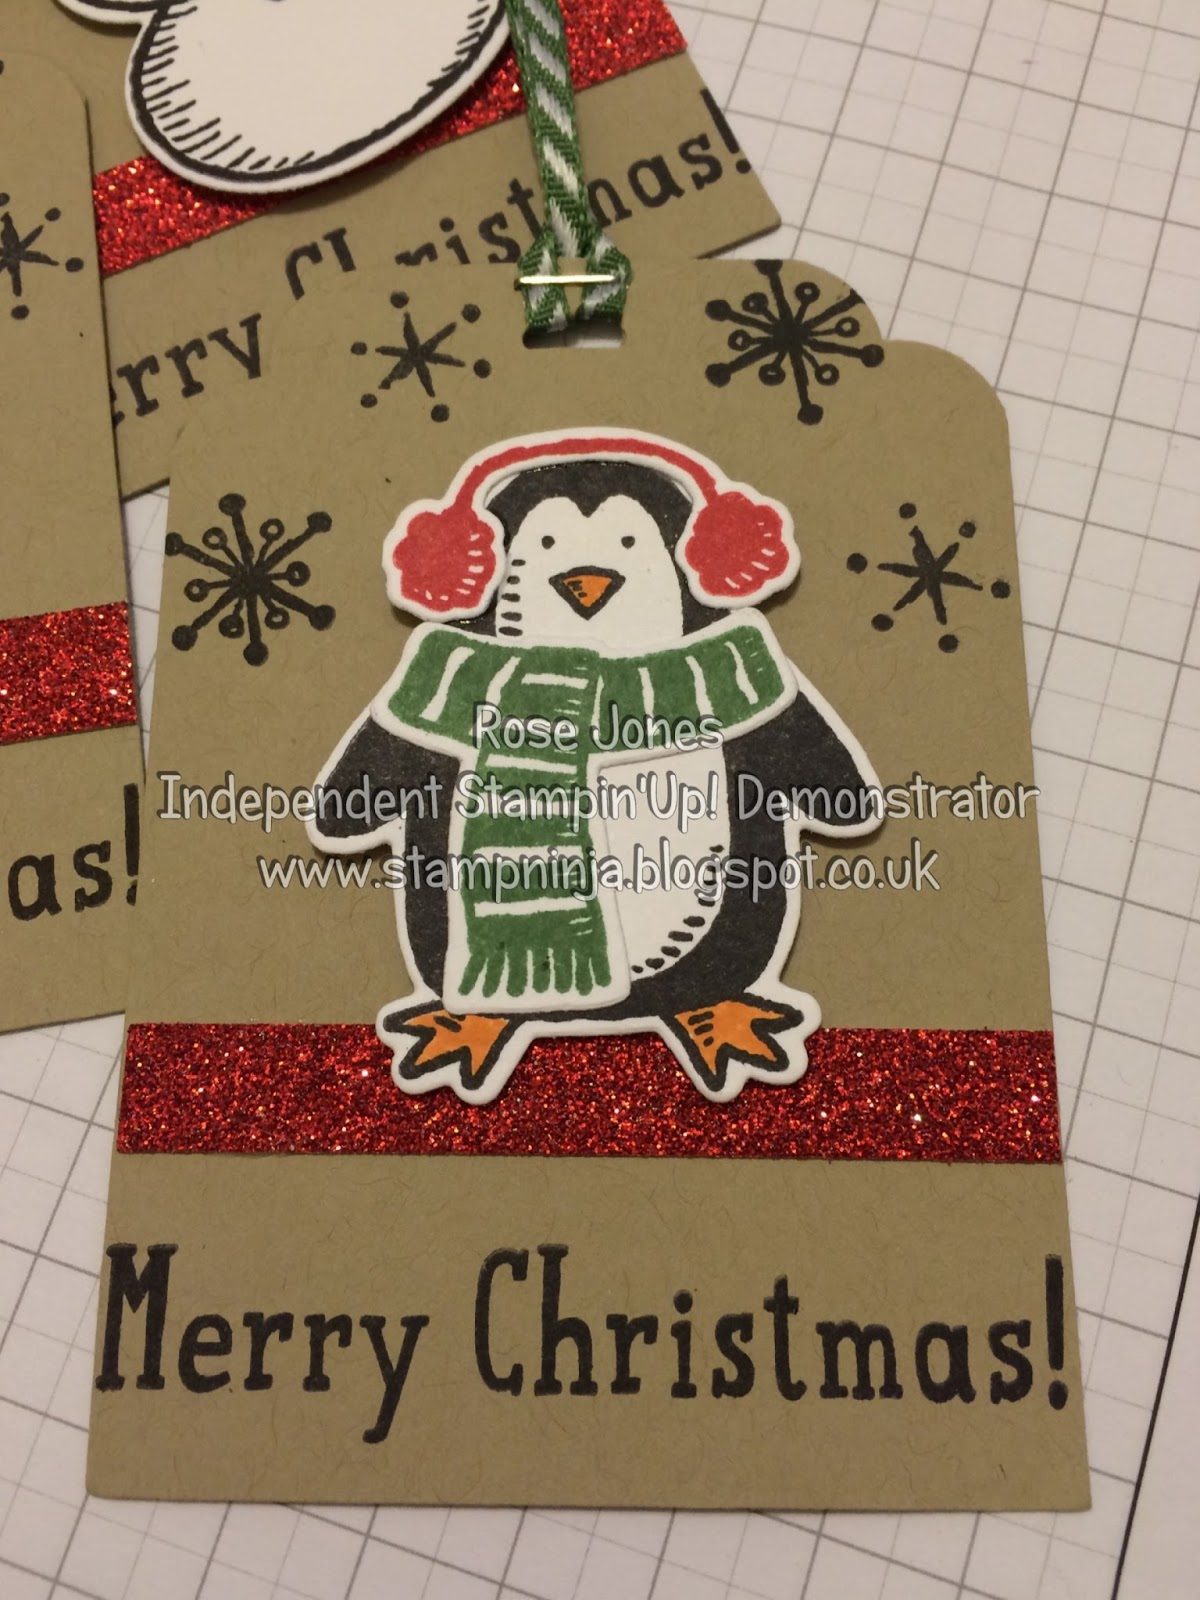
The tags are all basically the same, meaning they all have Merry Christmas stamped in Black at the bottom of the tag, they all have a piece of Red Glimmer card across the bottom and they all have snowflakes stamped across the top. The top of the tag has been punched using the Curvy Corner Trio Punch, both for the rounded corners and the little slot for the ribbon to go through.

 
Then I have decorated them using the Snow Place Stamp Set, here I have teamed the small snowman with the dog from the Hey Girl Stamp set and added a silver glimmer star.

 
Here I have used the Penguin and added the scarf and ear muffs...so cute.

 
Here I used the large snowman and added a scarf and hat and coloured in his carrot nose.

 
Here I put two little snowmen together...


This is the back of the tag with To and From and decorated with the little snowman.


They were a lot of fun to make, they would be great to give to someone or just to use yourself, homemade tags are just so special...


Hope you like, thanks for stopping by......
Happy Crafting X