Monday, 12 October 2015

Super Cute Gingerbread Man

Hello and welcome back....

It's been a busy weekend, crafting and otherwise, but I can't share it just yet.... I am off to Belgium in a few weeks time to the Stampin'Up Convention..."On Stage Live" and I am getting super excited. So as is the tradition of such things I have been busy making Swaps.
I have decided to make 50 which may seem a lot but when you consider there will be between 300 and 400 attendee's its really not...
Anyway I find that when doing something repetitive I like to have a little diversion so I do something a little different.. maybe sewing, crochet, Decopatch, jewellery......
So I dug out my felt and made a Gingerbread man for my Christmas Tree...

 
He is all hand stitched..ie. no glue!!!! I don't like gluing materials it just never seems to last...


Oh look I did manage to get some Stampin'Up! product in there too....lol. This lovely Ribbon is from the Autumn/Winter Catalogue, you get a reel of Red and a reel of Green perfect for Christmas for £7.25.

 
The button are Stampin'Up! too but they are from my retired stash... I have a bottle of retired SU buttons which always come in useful when doing unexpected projects...


So here we have the little chap, I think I may need to do another with a green bow...I like to have things in two's!!!!!


Thanks for stopping by, come back soon...
Happy Crafting X

Friday, 9 October 2015

Christmas Bag & Tag

Hey there & welcome back...

So yesterday I showed you some Fun Felt Robins that I made and it kind of gave me the idea for a cute little tag to go on a Christmas bag.....

 
Isn't it cute... So the gift bag is made using the Gift Bag Punch Board, so is super easy. This one uses a 12" x 12" piece of Merry Moments Designer Series Paper. You can make  a Small, Medium or Large gift bag, you cut your paper to size and just follow the instructions on the board...so, so easy.
 
 
This is the large bag.  The little Punch Art Robin is made using all Stampin'Up! Punches. The body is the 2 1/2" Circle Punch, the eyes are the 3/4", 1/2" and 1/4" Circle punches. The beak is just a triangle and the red tummy is the 2 1/2" Circle cut down. The feet and wings are the Flower Punch cut down.


After I had stuck his tummy, Beak and eyes on, I then attached his feet and wings to the back and I cut an extra 2 1/2" Choc Chip Circle to stick to the back to hide where I had attached them.


Hope you like my cute little robin, thanks for stopping by....
Happy Crafting X

Thursday, 8 October 2015

Fun Felt Christmas Robins

Hi there and welcome back...

I have something a little different to share today.... These super cute Christmas Robins I made for my Christmas Tree....


 Everything is hand stitched, even the eyes and beak...


They are going to look great on my Christmas Tree....can't wait....

Hope you like, thanks for stopping by..
Happy Crafting X

Wednesday, 7 October 2015

Curvy Keepsake Wednesday

Hello and welcome back to another Curvy Keepsake Wednesday...

Wow doesn't the week fly by... This weeks Curvy Keepsake Box is another Halloween box, I think he's supposed to be scary but he just doesn't seem to pull it off.. he's just so darn cute...
So this is Frankie...

 
I started off by cutting out two Curvy Keepsake Box components and before I stuck them together I daubed around he edges with Chocolate Chip ink.

 
The eyes are made with two 3/4" White Circles and a Wild Wasabi 3/4" Circle cut in half and two Black 1/2" Circles.

 
When you cut out you box components you will end up will some pieces that you have to poke out, a long thin piece and a small ovalish shape, you will use this for the nose.


The mouth I drew on with a Basic Black Stampin'Write marker along with the scars on his head.
 
His hair I drew freehand and cut out...


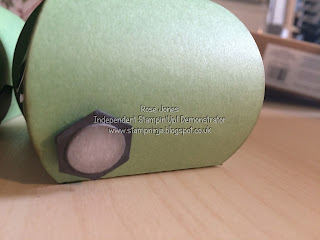
Then I made some cute little bolts for his neck, I used two Smoky Slate 1/2" circles stuck together and two Basic Grey 3/4" circles stuck together and trimmed to look like a nut, and then attached to his neck with dimensionals...


I think the kiddies are going to love these, especially filled with treats....


I hope you like this weeks box, thanks for stopping by....
Happy Crafting X

Tuesday, 6 October 2015

Sunflower Basket

Hello and welcome back....

I thought I would make some more Baskets using the Berry Basket Bigz L Die and as its Autumn and the Sunflowers are starting to fade I thought that would be a good theme...

 
I just love Sunflowers, they are simply beautiful....

 
I made the Sunflower with Leaves from the Leaflets Framelits, the long narrow one, I cut out 12 out of Crushed Curry Card Stock. I cut them down as they were too long and also made them a bit narrower, then I sponge daubed them around the edge with Chocolate Chip ink and stuck them to the back of a 1 3/4" Choc Chip Circle.

 
The center of the flower I stamped with spots and daubed around the edge with Choc Chip ink. I stuck it to the basket with glue dots...

 
The basket on the left has the flower which I didn't slim down the petals so were a bit chunky....


Love this little basket, I'm going to give them away filled with cookies....yum.. yum...


Hope you like, thanks for stopping by.....
Happy Crafting X