Sunday 23 November 2014

Punch Art Christmas Decorations

Well Helloooo

I have been having a little play with some bits and pieces that I had sort of started but didn't get very far.

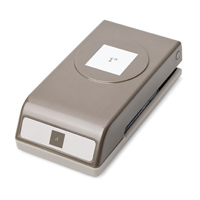
First is a little Gingerbread House, most of the decorations have been made using punches. for example the squares on the door have been made using the 1" Square punch, the little heart is from the Owl Builder punch.


 The door knob is a Candy Dot from the Brights collection.

 
I used the Striped Scallop Thinlits Die to create the effect on the roof. I used the Scallop Border Punch to create the top of the roof and under the eves.


The tree is made using the Tree Punch with bits cut out. The leaves are from the Bird Builder punch and the tiny blossoms are from the Boho Blossoms Punch


The second Christmas decoration is a Christmas Stocking with two cute teddies in. Again made using Stampin'Up Dies and Punches.


 I used the Ticket Duo Builder Punch to create the Merry Christmas Label.

 
 Both the Teddies have been made using Stampin'Ups Circle and Oval Punches, the Santa hat has been made with the Petite Pennant Builder Punch and Scallop Edge Border Punch.


This teddy is my design he's so cute its almost as if he's saying "Hug Me"


I'm loving the Thick Bakers Twine, this one is Baked Brown Sugar..Lush. The stocking is also 3D I stuck two Stockings together and then filled it with stuffing.
If you like what you see and want to recreate it check out the punches below and on my online store open 24/7 click on the button on my side bar or any of the punches below.


Wednesday 19 November 2014

Many Merry Stars Simply Created Kit

Well Hellooo

I am back with one of Stampin'Ups best Simply Created Kits yet, I am not normally one for using pre made kits to make cards etc but this kit is awesome and it has such potential....
You can just get the kit and make up all the stars as per the instructions and believe me they are lovely or you can mix it up a bit to make your own style its so easy.
So what do you get.....


The kit makes 26 stars in 6 sizes, it has die cut adhesive side strips, die cut stars, bows, tags and banners. It includes 21 laser cut wooden snowflakes, 60 silver sequins and 4.6m gold bakers twine.
Everything you need to create and decorate the stars ( just add a little extra glue for the decorations)
And if that wasn't enough Stampin' Up have the Many Merry Stars Stamp Set and Stars Famelits Dies which coordinate perfectly, so you can create your own individual style.
Here are just a few of the stars that I have made up so far, the largest at the back to the smallest right at the front.


 This star was plain ready to be decorated, so I stamped it using the star and snowflake stamps from Many Merry Stars, they fit perfectly and as they are clear stamps its easy to get them in the center without using a Stamp-a-ma-jig.


This green and gold star has been made into a gift box using the tutorial below.


And there are glitter ones too, I added my Cherry Cobbler Bakers Twine to this one along with a little tag.

They will be great as decorations for the house or Christmas tree or as gift boxes or even table decorations.. I have even seen someone use them to make a wreath.. As I said soooo much potential....
Check out Jenny Moors blog here for some more inspiration using this product, she has also created this tutorial on how to make the stars into gift boxes, which is really cool.
 
Star Box Tutorial
The sides of the stars come with all the double sided tape on them and they are all pre scored. Decide on the star you wish to make and then find the matching side panel. Use your Stampin' Up! Trimmer and cut it in half as shown below.


Keep one for the top of the star box and one for the base. Fold along the score lines as shown concertina style.


Join the ends together make two pieces as below.


I found it was easier to make up the star sides first before add them to the top star. I used the double sided tape and laid down the tabs lining up the sides. ONLY do this to one side only at the moment.


Find the two matching stars.  These two are plain so you could stamp on them, I didn't as I was adding bits to the top of the box lid.


Add one star to the sides using the rest of the double sided tape already on the sides.


When you turn it over the lid looks like this.


Now place inside the lid the other half of the side without taken the double sided tape of the tabs. This makes the base slightly smaller than the lid.


Now once you are happy with the shape, remove the tape covering and join up the points.


Add the second star shape to the tape to make the base.
Press down really well.


There you go! Now you have a lid and perfect base star box.


That is so cool, you can then use the scrap that the die cut stars leave to use as a template to make an insert so you don't see the glue tabs.

If you are tempted to have a go just click on the product boxes or the on-line shopping button on my side bar either will take you to my online shop which is open 24/7.

Thanks for stopping by...
Happy Crafting


Monday 17 November 2014

Owl Christmas Decoration

Well Helloooo

I wanted to make an owl cushion, but my fabric
is still packed away, (from our house move) so instead I decided to make an owl out of cardboard...
I didn't intend for it to be a Christmas decoration that's just how it turned out....lol


I cut out two owl bodies from Soft Suede 12" x 12" cardstock, I cut the wings out of retired Christmas Stampin'Up dsp, I love this one and it matched perfectly, the eyes were cut from Crushed Curry, Whisper White and Basic Black cardstocks using the 2 1/2" circle, 1" circle and the 3/4" punches.
I made the banner using the Perfect Pennants punch and Cherry Cobbler cardstock. the letters were from The Just Perfect Alphabet stamped in Cherry Cobbler and punched out using the 1" punch. They are strung together using Cherry Cobbler Bakers Twine.
 
I went around all the outside edges with an Early Espresso Stampin' Write Marker doing faux stitching. I stuck the two bodies together leaving a small gap and after waiting for the glue to dry I put some soft stuffing inside and glued the gap shut
 
Then to hang it up I used some Baked Brown Sugar Thick Bakers Twine, the cute bow was made using the lush new Cherry Cobbler Sheer Linen Ribbon, it is really gorgeous and makes beautiful bows.
 
I was surprised at how much fun this was to make hope you like...