Wednesday, 16 December 2015

Curvy Keepsake Wednesday

Hello and welcome back to another Curvy Keepsake Wednesday....

This weeks box is super cute and its my favourite thing about Christmas, I love Gingerbread Men.......So I have created a little Gingerbread Curvy Keepsake House.

 
Isn't it adorable... I started off with the basic Curvy Keepsake box cut out of Soft Suede Card and I sponged around the edges with Soft Suede ink.

 
For the tiles on the roof I used my Scallop Edge Border punch (sadly retired) and cut strips which I sponged before sticking to the box. This is easier to do before you assemble the boxes. For the sweeties I punched 1/2" and 1/4" circles out of Real Red Card and using my White Gel Pen I drew swirls on them before sticking them to the box.

 
For the window on the back of the box I used 1 1/4" Scallop Circle punch and 3/4" circle punch. Punch out the 3/4" circle  and then punch the scallop circle around the hole left by the 3/4" punch. I sponged it and added some White Gel pen dots around the edge and then I put a 1" circle of vellum behind and stuck it to the box.

 
I used the heart punch from the Itty Bitty Punch Pack to cut out Real Red Hearts and did some faux stitching on them before adding them to the box.

 
For the front door I used the large oval punch and added some detail with a White Gel Pen and then added a White Candy Dot for the door knob. The tiny window at the top is made the same way as the back window but using smaller punches, 7/8" Scallop Circle and the 1/2" circle punch, adding a 3/4" vellum circle behind. The candy canes are from the Stamp Set A Little Something (retiring at the end of December). The little Gingerbread man is hand cut and added to the box with dimensionals.

 
I do hope you like my little gingerbread house, all the products used are listed below (except retired items) just click on a picture to go to my on-line store.
Check out the End of Year Sale too for lots of amazing bargains.


Hope you enjoyed, thanks for stopping by....
Happy Crafting X

Tuesday, 15 December 2015

Easel Card Calendar

Hello and welcome back....

Today's Calendar is an Easel Card Calendar complete with Post-It notes. I love this one I have one on my desk and each year I just pop a new calendar on it....lol.
This one is for my daughter, hence all the pinkness...


This is really an Easel card with Post-It notes to hold the card open. I started with half an A4 piece of card cut lengthways as before. Then score it at 14.9cm and 7.5cm, which give you the basic easel. I used Melon Mambo card for the base.


Again with this type of calendar you need to choose something that you will love looking at all year, hence the cute pink teddy, I love the way she is holding the calendar. She is a paper piecing teddy and each piece has been sponged before assembly. The mat behind the teddy is Pink Pirouette with a layer of Melon Mambo behind that. I used the Curvy Corner Trio Punch to shape all the corners, even on the Post-It notes. The background is a mixture of Gorgeous Grunge and the Perpetual Birthday Calendar stamp sets.


The sentiment is from An Open Heart, stamped in Melon Mambo, and a little Gorgeous Grunge and some tiny pearls for some prettiness........


This calendar also folds flat for posting, but due to the Post-It notes its not normal postage. Luckily she is home from Uni so I can give it her to take back with her...


She will love it...
 
I have listed all the products used below so if you need anything just click on a product to go directly to my on-line shop, its open 24/7.


Thanks for stopping by, pop back Thursday for calendar number Three......
Happy Crafting X

Monday, 14 December 2015

An Open Heart Calendar

Hello and welcome back...

Well its that time of year again when we start looking at getting a new calendar, so I thought that this week I would share some with you.
Today's is a very simple one and very easy to make.

 
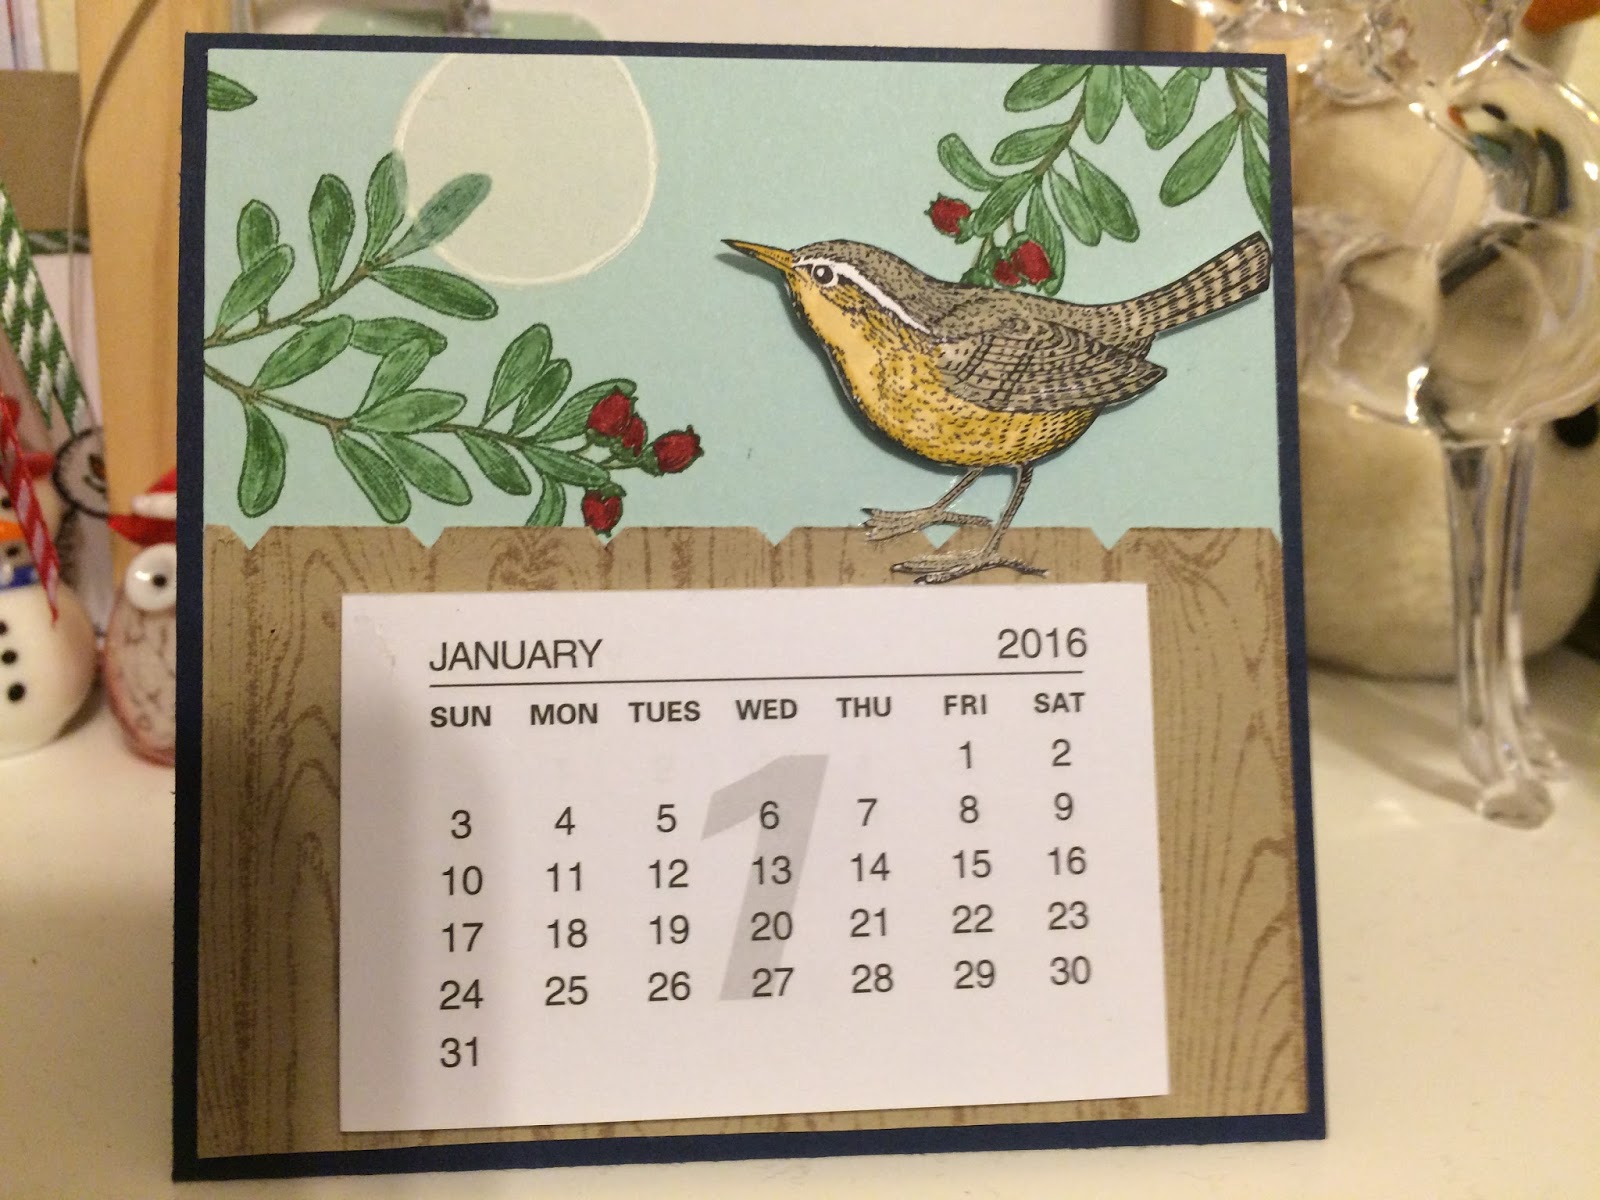
The main thing about this type of calendar is that you choose an image that you are happy to look at all year, which is not a problem with this stamp set, I love this bird from An Open Heart, I stamped it in Basic Black and coloured it in with Soft Suede and Crumb Cake on top and Crushed Curry and So Saffron on the bottom.

 
I used a piece of Night of Navy card stock for the base, you can get two out of one piece of A4, just cut it in half lengthways, then score at 10.5cm, 21cm, 24.5cm and 28cm. Fold score lines and assemble.

 
The mat on the front is Soft Sky and is 10cm x 10cm, I sponged a pale sun or moon and then stamped the foliage in Garden Green, I used  a blender pen to colour in the leaves and berries. I made a fence using the Hardwood stamp and stuck it to the bottom half of the card. Then I stuck the bird on using dimensionals for the body and tombo to stick his feet down.


Finally I stuck a calendar to the fence. These can be purchased from most stationery stores or craft outlets.

 
The calendar can fold flat for posting and mine was not any extra postage to send.


So there we have calendar number one, pop back tomorrow for number two......

All products used are listed below if you would like to order just click on a product to be taken to my on line store open 24/7....


Thanks for stopping by....
Happy Crafting X

Sunday, 13 December 2015

Cupcake Christmas

Hello and welcome back.....

Today I have some really cute cupcake boxes with some surprising cupcakes inside!!!! Why surprising? because they are not edible they are wearable! They are actually cute socks in a cup cake case.
 

Don't they look yummy...lol. I got them from a local store, they either have Penguins or Robins on, very Christmassy.... Well as soon as I saw them I knew I wanted to make cup cake boxes for them.

 
For the base I chose Chocolate Chip Card, and for this box you will need a piece 16cm x 16cm and scored at 8cm on all sides. To make the box strong I cut down one score line on each side, (so cut the first score line turn 90 degrees, cut down the first score line and turn 90 degrees etc ) so when you assemble you have a double thickness of card on each side.

 
For the lid I chose Real Red Card, you will need a piece 14cm x 14cm scored at 2.9cm on all sides, which gives a nice snug fit. Then I used the circle framelits to cut a hole in the top so you can see the contents. I used die number 4 (center one is number 1), then I put a piece of window sheet behind the hole and then assembled the lid.


For the inside I used a piece of card 14cm x 14cm and scored it at 3.1cm on all sides. I cut a hole using the circle dies as before, then assembled it and put it inside the base, this will hold your cup cake in place.

 
Then you just decorate it, I chose my favourite little Penguins, on two of the boxes I put a Penguin on each side, some with Christmas hats some with scarves. I put Real Red Ribbon around the lid.


For these boxes I used Cherry Cobbler Card instead of Real Red.

 
I made little tags using the Curvy Corner Trio Punch, I cut out a Penguin and stuck it on the tag and added a hat and a sentiment.


 So very cute. Ideal stocking filler. Socks are cute too....lol


I have listed all the products used below, today is the last day to order if you want them delivered before Christmas....


Hope you like, thanks for stopping by.....
Happy Crafting X

Saturday, 12 December 2015

Year End Sale


There are lots of bargains to be had, order before 13th December to receive them before Christmas.