Wednesday, 6 January 2016

Curvy Keepsake Wednesday

Hello and welcome back to another Curvy Keepsake Wednesday...

This weeks box is all about the Bear...Cute little Teddy Bears..


Sorry about the photos but its very sunny today (not complaining) and I couldn't get a decent photo! I love Teddy Bears so much so that I have a vast collection of furry friends so I thought I would create a Teddy Curvy Keepsake Box.


I really love how you can change one thing and it gives you a totally different look, for example the eyes, on the boy bears I used just black with a white gel pen highlight, on the girl bear I used white and black and I even gave her some eyelashes lol.

 
The Teddy is really simple, it's just the basic box which I have sponged around the edges. I used the large oval punch for the muzzle and trimmed it down to make it smaller and added the nose which is waste from cutting out the Curvy Keepsake Box!
 
The eyes have been cut freehand and the mouth has been drawn on, tip if you are not good at drawing mouths then punch out the small heart from the Itty Bitty Accents Punch Pack and turn it upside down and draw around the bottom part of the heart.. perfect mouth.
 
The ears are 1" circles, score a line towards the bottom of the circle and fold over, snip the smaller portion and bend to shape, stick to box with Tombow glue, it gives you wiggle room.
 
I used my Chocolate Chip Stampin' write Marker to add some detail to the face and a white gel pen to add some highlights to the eyes and nose.
 
They are just so cute, perfect for children's parties and they don't have to be brown.....

I have listed all the products used below, just click on a picture to go to my on-line store to order, and remember during Sale-A Bration for every £45 you spend you get to choose an item for FREE from the Sale-A-Bration Brochure. AND if you use the Hostess code at the top of this blog you will receive more freebies from me.


Hope you feel inspired to create something with the Curvy Keepsake Box Thinlits,
Thanks for stopping by....
Happy Crafting X

Monday, 4 January 2016

Shadow Box Frame Card

Hello and welcome back...

So excited only one more day until the New Spring / Summer Catalogue goes live and the start of Sale-A-Bration, check back tomorrow for more info.

Today however I have a sneak peak at what is to come, It's a Shadow Box Frame card, featuring the Large Numbers Framelits and Balloon Celebration Stamp Set....


You could just have the Box Frame without adding the card to the back and pop a picture in it for someone. But here I have made a card for my Son's 18th Birthday, it makes it kinda special.


I love these balloons from the Balloon Celebration Stamp Set, you get two sizes, this is the smaller one, I stamped them in Night of Navy, Pacific Point and Pool Party, then I drew the strings using a Stampin' write marker.

 
These are the gorgeous Large Number Framelits, I cut them out of Silver Foil Sheets, the words are from the matching Number Of Years Stamp Set. (Buy as a bundle and save 15% off the regular price.)

 
I used it again to add some detail to the inside and stamped his name using the Epic Alphabet Stamp Set.
 
The shadow box part of this card uses one sheet of A4, if you would like to know how to make it check out this video HERE

 
Love how this came out and so did my Son.

I have listed all the products used below if you would like to place an order please click on the links below.


Thanks for stopping by....
Happy Crafting X

Sunday, 3 January 2016

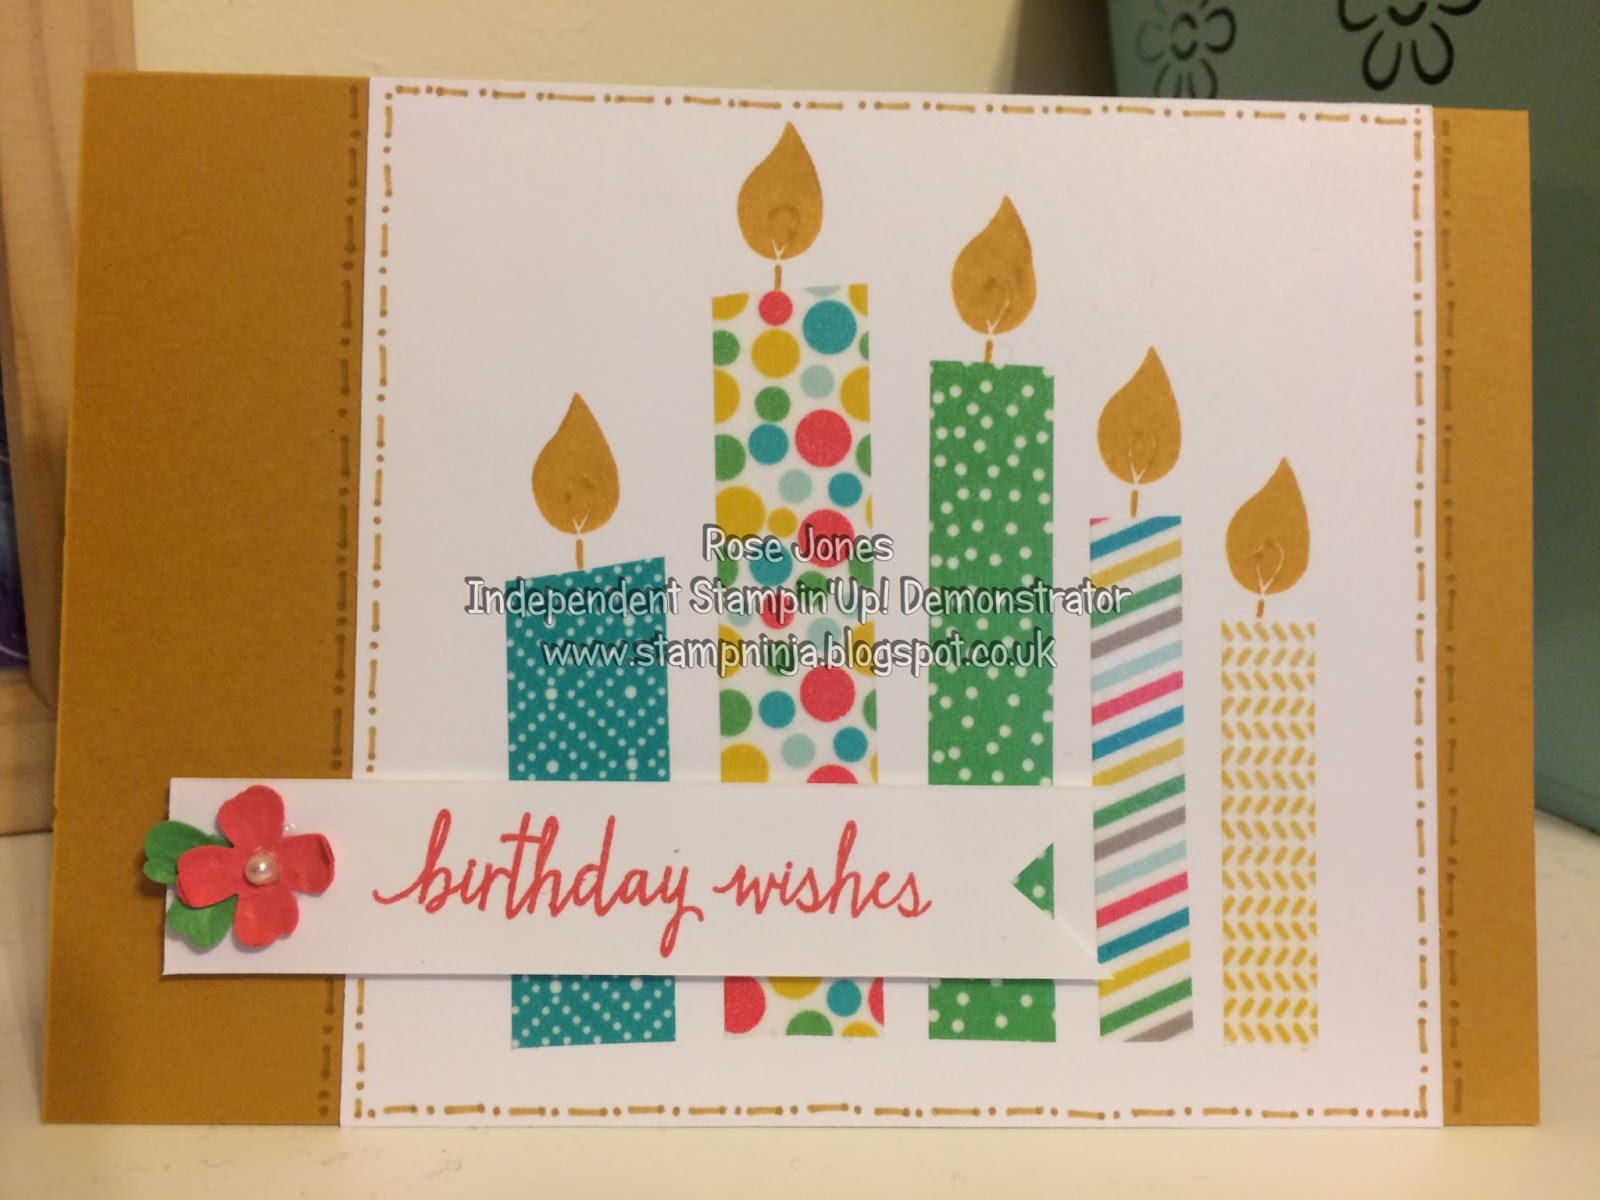
Build A Birthday Candles Card

Hello and welcome back...

Today's card uses the Build A Birthday stamp set and also the Cherry On Top Designer Washi Tape.
 
The candles are not stamped they are made using the Cherry On Top Washi Tape...Fun aren't they.
 
My base card is Delightful Dijon, with a layer of Whisper White cut shorter than the card base.
 
I cut the Washi Tape in varying lengths and then stamped the flame in Delightful Dijon on each candle.
 
I added some faux stitching around the edge with my Delightful Dijon Marker.

 
Then I made a little banner stamped with Birthday Wishes in Watermelon Wonder and popped it on the card with dimensionals. To finish I punched out a flower from the Itty Bitty Accents Punch Pack and added it to the banner.

 
 The same card but on a Cucumber Crush card base.

All products used to make this card are listed below, just click on a product to order.


Hope you like, thanks for stopping by....
Happy Crafting X

Saturday, 2 January 2016

Build A Birthday Card

Hello and welcome back....

Today's card is simple but sweet....

 
I started off with a Thick Whisper White base card and added a Cucumber Crush mat.

 
Then I stamped the cake stand in Tip Top Taupe and the cake layers in Watermelon Wonder, Delightful Dijon and Cucumber Crush. I used the flower from the Itty Bitty Accents Punch Pack to create some little flowers for the cake and added a pearl to each one.

 
Lastly I stamped the sentiment in Watermelon Wonder.

 
The thick Whisper White card is just perfect for card bases, I prefer to use the thinner Whisper White for stamping on and water colouring.

Everything you need to make this card is listed below, to place an order just click on a product to go to my on-line store or if you prefer contact me to place your order. Remember to use the hostess code at the top of my blog to receive extra product from me.


Thanks for stopping by...
Happy Crafting X

Friday, 1 January 2016

Build A Birthday meets Ballon Celebration

Hello and A Happy New Year...

On the 5th January 2016 our New Spring/Summer Catalogue goes live and today I am going to share a card which gives a sneak peak at a gorgeous stamp set from that catalogue.

 
The base card is Bermuda Bay, with a layer of Tip Top Taupe. I created the side panel using the New Stamp set Balloon Celebration, stamping one of the balloons in Bermuda Bay. Watermelon Wonder, Crushed Curry and Cucumber Crush.


I made a mask by stamping the balloon on a sticky note and cutting it out, then covering a balloon before stamping. I used the Tip Top Taupe Marker to draw the strings and the White Gel Pen to do some high lights on the balloons.
 
I stamped the cake stand in Tip Top Taupe and the cake layers in Bermuda Bay, Watermelon Wonder, Cucumber Crush and Crushed Curry on a piece of Whisper White card and then cut it out. I added it to the card using dimensionals.
 
I stamped the sentiment at the top in Basic Black and added the flags on top which I had stamped on white card and cut out.
 
Finally I added some of the In Colour Blossom Accents to finish it off.
 
All products used are listed below, to order just click on a picture to go to my on-line shop. 


Balloon Celebration Stamp Set 140675

I hope you like today's card, thanks for stopping by...
Happy New Year Crafting X